Checking your GCode programs is critical to ensuring that your machine runs reliably and as trouble free as possible.
The best way of doing this is by using a GCode simulator.
This type of software will give you a visual check of what your program will do before you run it on your cnc machine.
GCode Simulators are also known as a G code viewer, G code visualizer or a G code analyzer, help to prevent crashes and tool breakage which will save you money and frustration.
GCode editor
Practicing writing your own G code can be tricky, even when you have been doing it for years. Mistakes are easy to miss, especially when staring at a text file crammed full of numbers and prefixes.
This is where a cnc simulator excels, most of them are also G code editors, allowing you to check your programs as you write them.
So no more typing out your programs in Wordpad hoping that it will be error free, you can program and prove it out as you go.
All CadCam software products are equipped with a tool path simulator, it is what makes them so versatile. But you cannot use them to ‘type and test’ your own programs because they use a built-in G Code generator that processes the G code for you from the cad files.
This is why a standalone CNC G code viewer is really helpful when writing your own code.

Also, being able to write and prove out a program while sitting on a living room couch is much more convenient than sitting in your cold workshop.
Unless you have a couch in a warm workshop.
Which is the best free CNC Simulator?
The software I use at work for testing cnc toolpaths is Cimco Edit. It does everything you could want, including multi axis simulation, but it costs a small fortune, which is not ideal for a hobby machinist.
So I looked around the web and found a couple of Programs to test for this article, the key factor being that they are free to use.
NCViewer
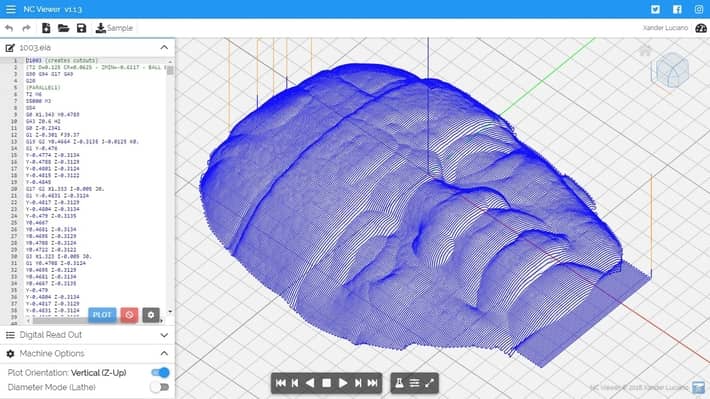
Nc Viewer is a browser based G code editor and simulator. This means you can bookmark the website and visit to use it, no download necessary.
It is also mobile friendly, although using it on mobile is not an easy experience, the screen is too small to be useful, even on a larger phone.
As you can probably guess it is very basic with limited functions, although it does support lathe and 3D printing G-code which is useful.
Upon launching the browser you are presented with a backplot area grid showing the three basic X, Y and Z axis directions.
The red line represents the X axis, the green line is the Y axis and the blue line is the Z axis.
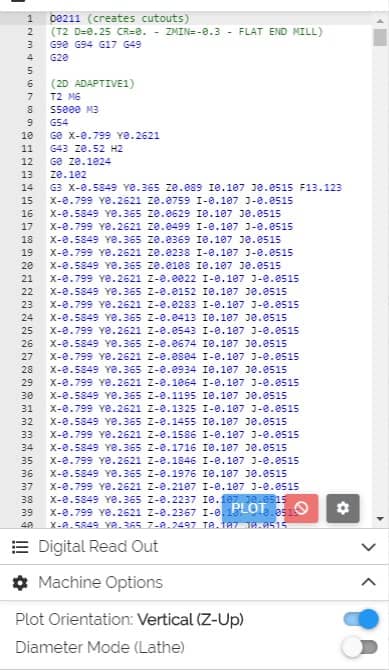
On the left hand side of the screen is a sidebar containing the G Code file editor, a digital readout and a couple of basic machine options.
This panel can be toggled on and off using the small ‘hamburger menu’ icon in the top left hand corner of the screen. Or alternatively by pressing ESC on your keyboard.
The file menu below the hamburger icon consists of :-
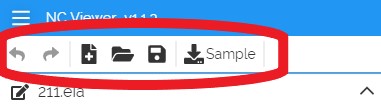
- Undo
- Redo
- New file
- Open file
- Save file
- sample
‘Undo’ and ‘redo’ are self explanatory.
‘New file’ will clear the editor ready for you to type a program.
‘Open file’ lets you load an existing program.
‘Save file’ will download the current program in the editor to your computer and ‘Sample’ will load a demonstration program for you to quickly check out how NC Viewer works.
At the bottom of the editor screen are three icons, Plot, Remove Plot and a settings button (gear icon).
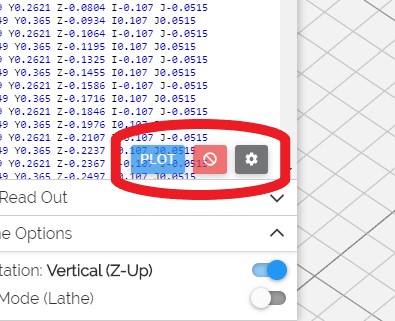
If your GCode did not automatically plot and the backplot grid is empty, press the Plot button and it should appear.
Pressing the red Remove backplot button will clear the tool path from the work area.
The settings button will open a panel with an array of options to customize the editor window.
Below the editor window is the digital readout. This will display the position of the ‘digital endmill’ as it runs through your G Code.
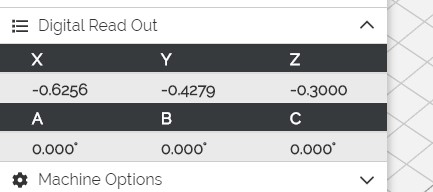
The option window below the readout has two ‘machine options’.
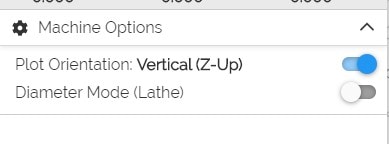
Plot orientation lets you view your G Code program as if you are running it on a vertical mill or a horizontal mill.
The diameter mode option lets you display a lathe program.
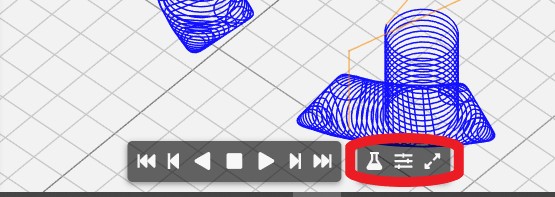
Moving on to the main backplot screen where your G Code toolpaths are displayed, there is a menu at the bottom of the screen that will control the movement of the ‘digital cutter’.

This consists of the familiar buttons for play, rewind, step forward and backward etc.
Alongside those are some option buttons for customizing the backplot area.
To move and orientate your cutter paths you can use your mouse or the view ball in the top right corner of the backplot screen.
To zoom in or out on your cutter paths you use the scroll wheel on your mouse, by either rolling the wheel or pressing it and moving the mouse backward or forward.
To pan your cutter paths, click and hold the left button and move your mouse.
To rotate the cutter paths, click and hold the right button and move your mouse.
These features can also be changed in the ‘experimental options’ button on the backplot screen.
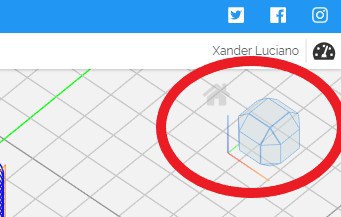
Another way to orientate your toolpath backplot is by using the ‘view ball’ in the top right hand corner of the screen. Just click on the different areas of the ball for different view perspectives or click the home symbol for a standard isometric view.
How good is NC Viewer?
I played around with a few different G Code programs to see if I could find any issues.
I found that it works best displaying lines and arcs and will run through the whole program quite fast.
In fact if you have written a simple program it runs through it too fast, you have to use the step button if you want to see what it is doing.
A speed control function would be useful to control how fast the tool path runs.
When it is processing a large cam file it will slow down enough for you to watch what it is doing, at least it does on my laptop. A more powerful PC will probably run it faster.
Limitations with NC Viewer
The first small issue is its inability to recognise tool offset, G41, G42 etc. This is not a huge issue and one that is common on a lot of cnc simulators.
It will only show the centerline of the tool path as there is no function to recognise any tool diameters.
The next problem I found was with using drilling cycles, i.e. G81, G83. It will show the tool paths ok, plotting each position which gives you a good visual check.
The issue is when you run the tool through the program, it treats it like a line to line program and does not retract the tool.
This is not how the program will run and could lead to confusion for an inexperienced machinist.
The next test I gave it was plotting a G code program that uses a subroutine and as expected it failed to read it properly.
You will have to use your machine control software to check subroutine programs, if it does not work on your machine control software, it will not run.
Camotics
Camotics is a G code simulator software free download. It is an open-source, free to use, 3 axis cnc mill simulator.
Features
- 3-axis workpiece simulation with 3D visualization
- Simulates cylindrical, conical and ball nose tools.
- Supports LinuxCNC
- Export cut workpiece to STL file
- Tool table editing
Limitations
- No lathe simulation
- No 5 axis simulation
- No collision detection
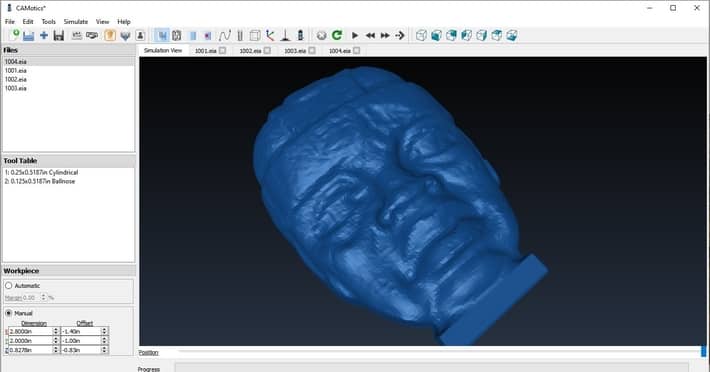
Unlike Nc Viewer, Camotics is a program you have to install on your PC. This software comes equipped with more features and has a more ‘professional’ look.
Its main advantage is that it does not just show the toolpaths, it will create the finished part in a virtual material.
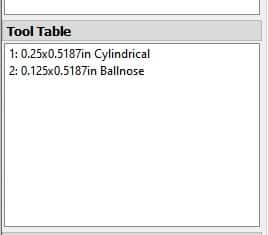
For it to do this you have to specify a list of the tools in your program and it will create a part based on the cutter paths and the tools used.
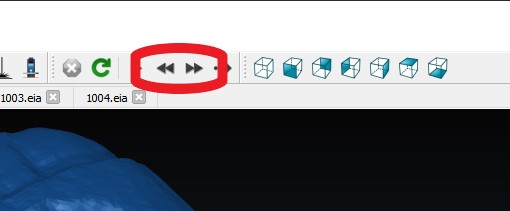
You can load multiple programs at the same time and run them all on the same part, ideal for testing both roughing and finishing programs.
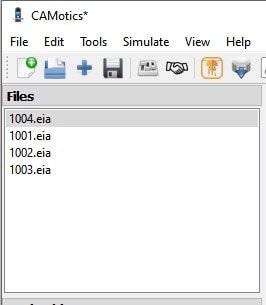
The loaded files can be edited or written in the main window by double clicking on the file name in the sidebar. This will open up a new ‘tab’ in the main window giving you access to the text editor.

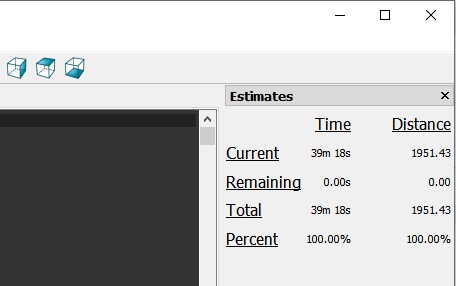
It will even give you a run time estimate for your program based on your feed and length of toolpath.
It has many features that Nc viewer does not have, including the ability to speed up and slow down the simulation speed.
This is very useful and something that should be standard in any cnc simulator.
There are loads of toolbar options so I will just leave a link to the Camotics manual for you to read through.
The view menu gives you lots of options to try out and you should definitely familiarize yourself with these.
Just like any software, the best way to learn is to use it and Camotics provide a long list of example toolpaths for you to load and use to enable you to get familiar with the software.
Again I tried loading a program that used a subroutine and it did not work. This feature seems to be beyond what free software is capable of.
How to create GCode
No G code simulator is designed to actually produce the code itself, for this you need to write your own basic programs or use Cad Cam software to produce complex parts.
Fusion 360 Cad Cam software is free for hobbyist cnc machinists and can produce tool paths for anything you want as long as you have a Cad model.
There are a few basic tutorial articles on this website such as 3D cnc machining tutorial.
But if you want a well structured online learning course, I can recommend fusion 360 Tutorial for cnc machinists on Udemy.
If you want to skip making a program altogether you can download my ‘spider’ programs and load them in one of these G Code simulators. Just go to the G Code Example article.
Conclusion
So which G Code simulator software do I think is best?
Camotics is definitely the most accomplished program but both have their uses and Nc Viewer is probably the quickest and most convenient to use.
If you just need to give your G code a quick check to show it will do what you want, Nc Viewer can’t be ignored.
Camotics capabilities for a free software are fantastic and the tool table feature and its part production ability make it perfect for checking larger more complex programs.
They are both free, so try both and decide for yourself.

