What is Universal Gcode Sender? (UGS)
Universal Gcode sender (UGS) is a free to download Gcode software program. It is very much like Candle and as such is also ideal for a newcomer to cnc.

It incorporates a G-code visualiser and has the basic functions you need for sending your G-Code to a cnc machine.
This program does need you to install Java on your PC if you don’t already have it installed.
It can be used on a PC, Mac and Linux computer.
I have also reviewed Candle GRBL software as well, which is very similar, so which would I say is the best Gcode sender?
Read on to find out…
How to download Universal Gcode Sender
Simply go to https://winder.github.io/ugs_website/download/ and download one of the stable versions, I downloaded the ‘classic’ 2.0 version.
What type of Cnc machines use Universal Gcode Sender?
Just like the GRBL candle software, it is aimed at the home user and the DIY built cnc routers and mills.
U.G.S can be used with Arduino (GRBL), TinyG and Smoothieboard hardware whereas candle software is Arduino (GRBL) only.

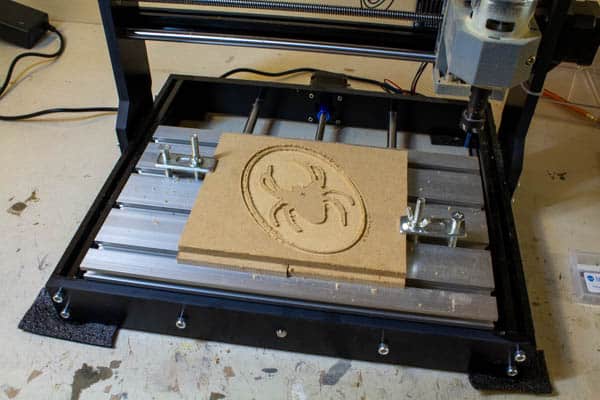
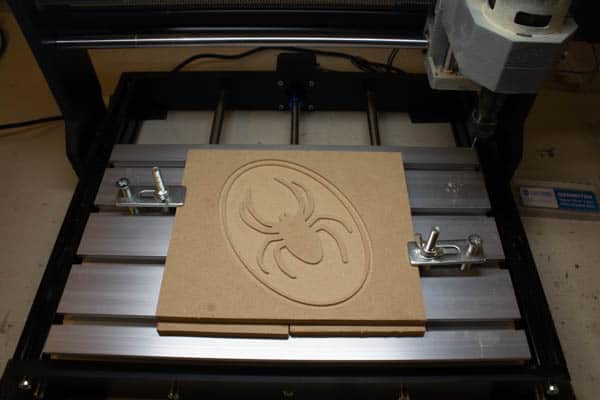
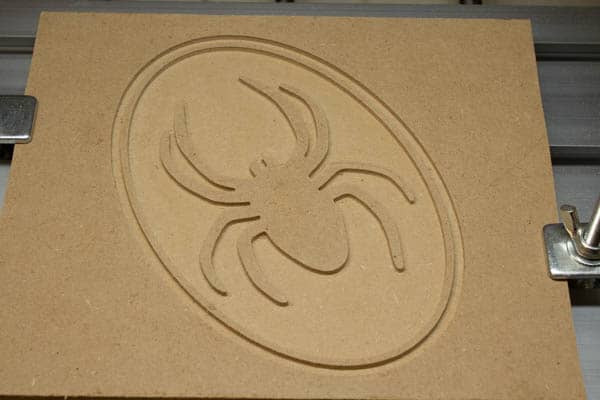
For this review and tutorial I am going to be testing it with my 3018 cnc engraving machine. I created a quick Gcode program of a spider using JsCut as I did for the Candle software tutorial. This will let me compare the two software options to see if there are any advantages or disadvantages for each one.
Universal Gcode Sender Tutorial (2.0 classic version)
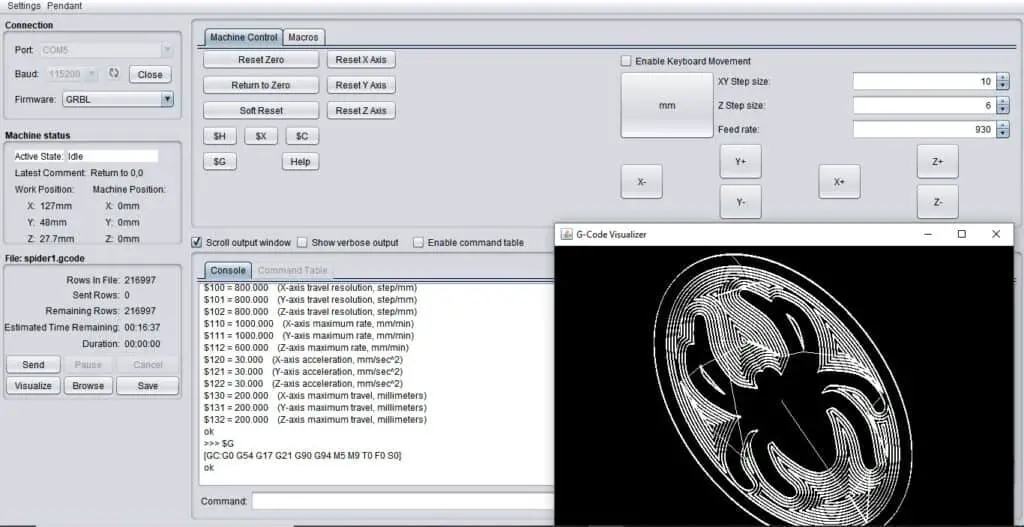
I will go through the process I used for setting up and running my arduino (GRBL) based 3018 cnc engraver as this is the same machine I used for the Candle tutorial.
Connection
This section enables the connection to your cnc machine, choose the com port, set the baud rate at 115200 and select your firmware.
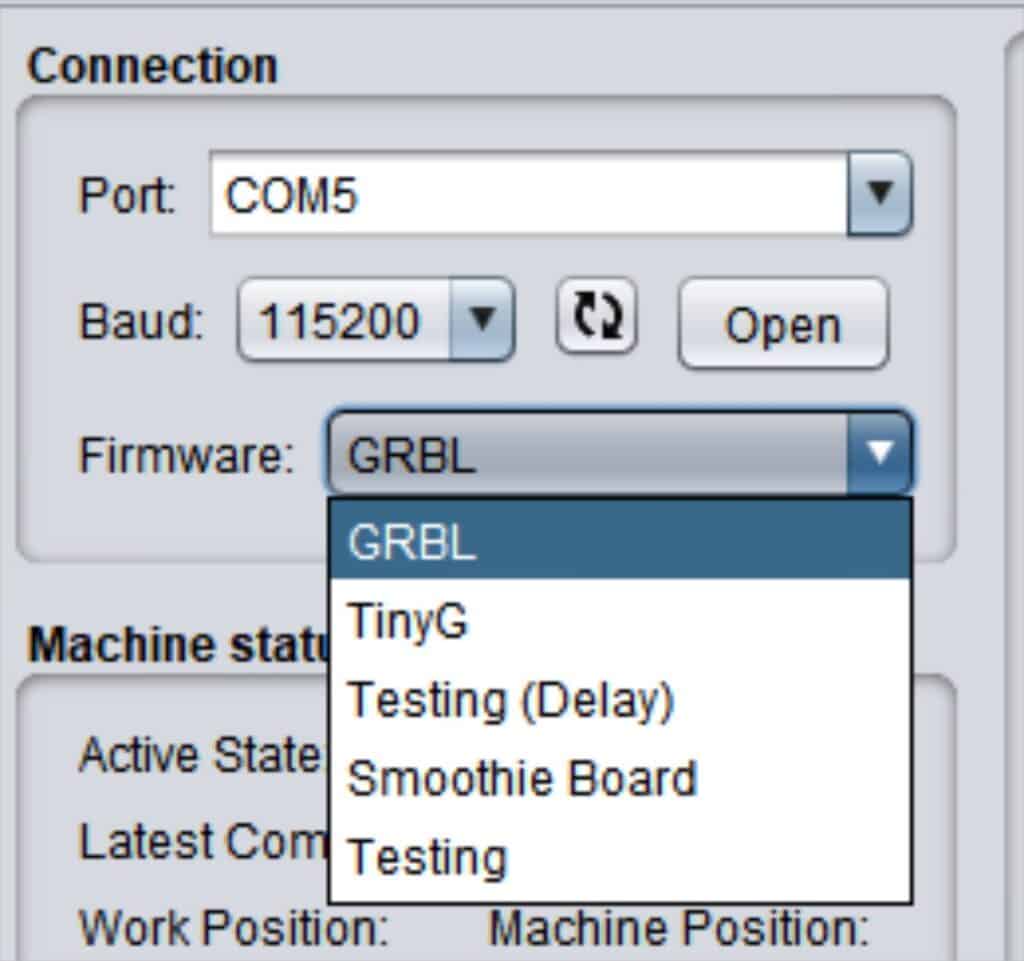
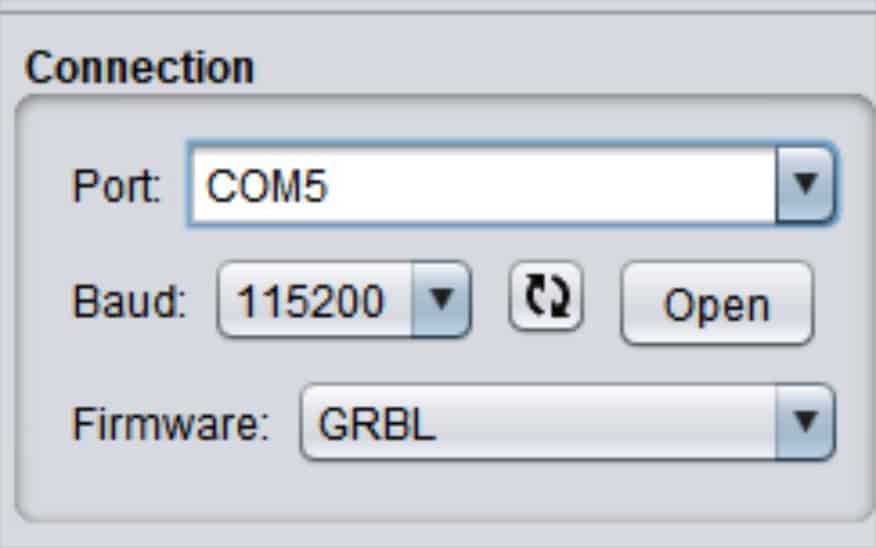
To connect to your machine press ‘open’ and you should be good to go. I had to cycle through the com port choices to find the correct one.
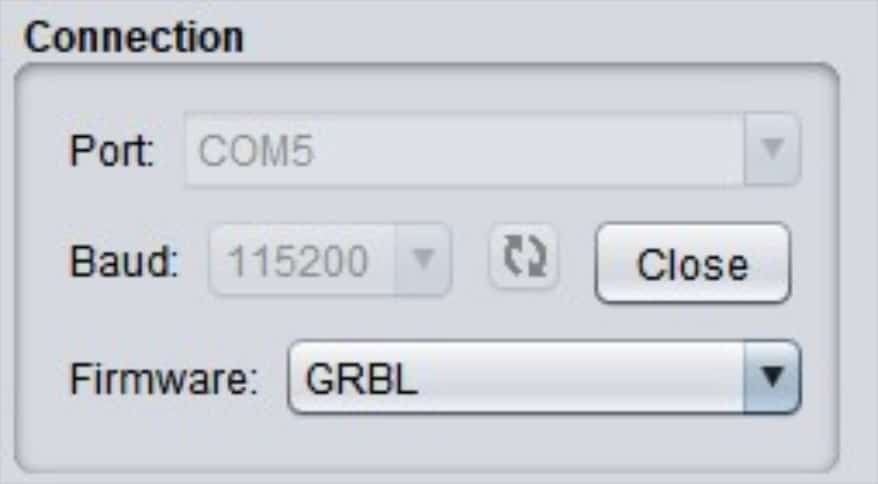
When connected, the options will grey out and the ‘open’ button will change to ‘close’.
Machine Status
While your machine is connected this section displays its state, e.g. idle or running etc.

This area also displays the machine’s position, both relative to your offset and to your home position.
File
Moving further down we have the file section. To load a program, click ‘browse’, locate your Gcode file and load it. Once loaded more of the buttons will be active to allow you to save, visualize and send the program.
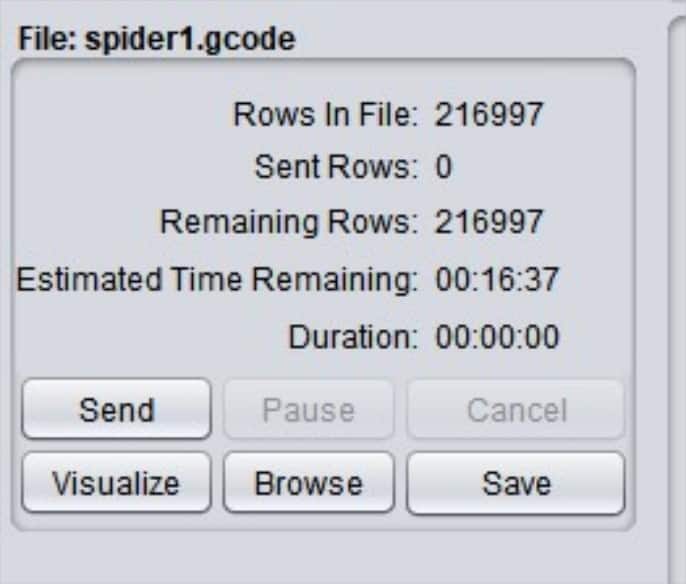
Clicking the visualize button will open a new window with your toolpaths plotted out.
The send button will start the machine running the Gcode. Once the program is running the pause and cancel buttons will be active, allowing you to pause the machine’s movement or cancel the program completely if needed.
This area will also display the number of lines in the program, its estimated running time and how long it has been running for.
Jog Controls
Over to the top right of the screen are the jog controls. I was a little disappointed to find that there is not an option for continuous movement.
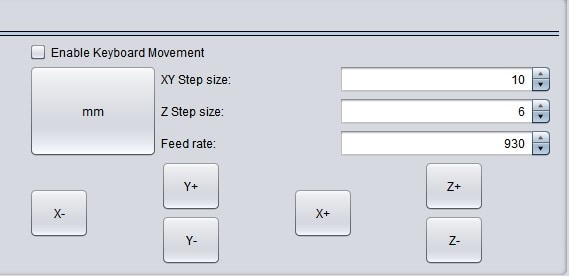
There is only an option for step movement. Select the distance you want to move and press the desired direction button.
You don’t hold the button down, just click once and the machine will move the set distance.
There is a big button for changing the units between MM and Inches.
This is a big plus over the Candle software which will only display in MM, even though it will run an imperial (inches) program.
Universal Gcode Sender keyboard Jog Commands
X axis = arrow left/right, keypad left/right, Numpad 4/6
Y axis = arrow up/down, keypad up/down, Numpad 8/2
Z axis = page up/down, keypad page up/down, Numpad 9/3
Increase/Decrease steps = keypad +/-
Change steps = Keypad divide/multiply
Reset Zero = Keypad insert , Numpad 0
Machine Control
As well as the jog control area, there are other commands for setting offset positions etc,
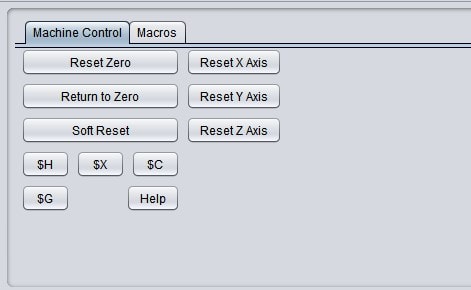
Reset Zero
This button will set the datums (Zero) of all three axes at once. Position the tool at the datum point of your stock and press it.
Return to zero
Use this to move your machine to its datum position.
Soft Reset
This command will run what is commonly known as a safety line. It resets all the main modal Gcode commands.
Press this button after cancelling a program and before you want re-start.
Reset X axis
The wording of this is slightly confusing, but it means ‘zero your X axis’.
Use this when you have your spindle/tool positioned at the X zero datum position on your workpiece.
This will zero your X ‘work position’ reading.
Reset Y axis
Use this when you have your spindle/tool positioned at the Y zero datum position on your workpiece.
This will zero your Y ‘work position’ reading.
Reset Z axis
Use this when you have your spindle/tool positioned at the Z zero datum position on your workpiece.
This will zero your Z ‘work position’ reading.
$H
This button activates the homing command. Your cnc machine needs to be equipped with limit/homing switches and have them correctly set up in the firmware settings.
If your machine does not have them you can set up a macro to home your machine. I’ll show you how to do that in the macro section later in this article.
$X
This button unlocks your machine if it is in an alarm state.
$C
This button activates ‘check’ state. It will disable all movement of your cnc machine allowing you to run your Gcode ‘virtually’ to check it for errors etc.
$G
This command means ‘get state’, it will show your currently active modal commands in the console window.
Macro Window
Click the macro ‘tab’ and this window will show you all the macros you have set up. A macro is a stored pre set command, click one button and it will run the stored Gcode.
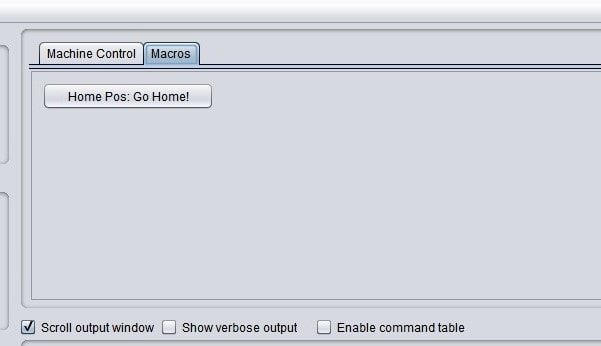
I set one up to ‘home’ my 3018 engraver. There are no limit/home switches so I just use the G28 command.
To set up a macro go to ‘settings > macro settings’ and the macro settings box will show up.
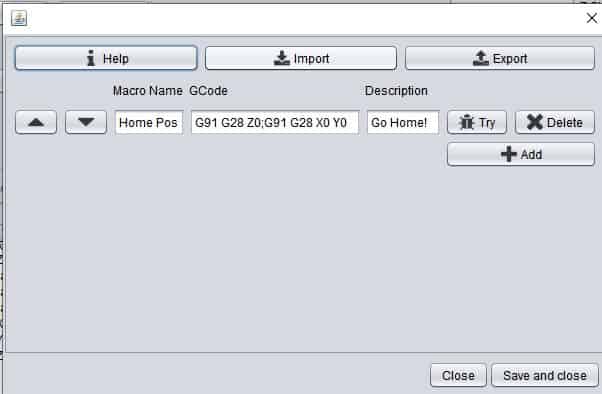
Click ‘add’, Give it a name and a description, then type in your Gcode. If you want to add code to be able to home your machine, type (or copy and paste this) G91 G28 Z0;G91 G28 X0 Y0
Then press ‘save and close’.
Your macro will now show up in the macro window.
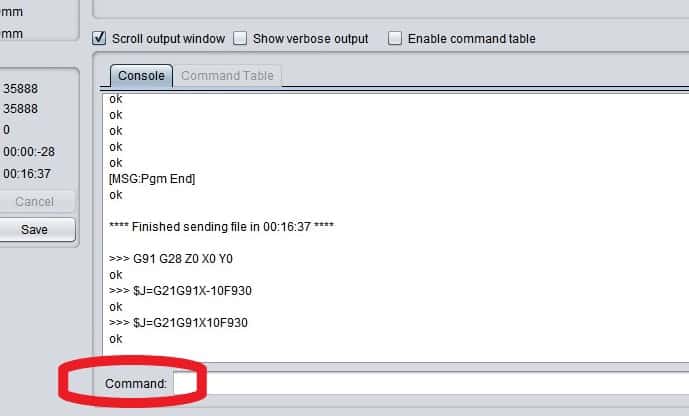
Command
This is located at the bottom of the screen and is basically an MDI (manual data input). Use this function for executing individual lines of code.
Settings
The drop down menu at the top of the screen includes options for setting firmware, sender settings and Gcode processor configuration.
When connecting my 3018 engraver I only had to make sure it was set to GRBL and it connected and worked with no issues.


If you are using a different machine or need more help with the firmware settings you can check out the GRBL wiki settings page for detailed explanations to help you.
Testing Universal Gcode Sender
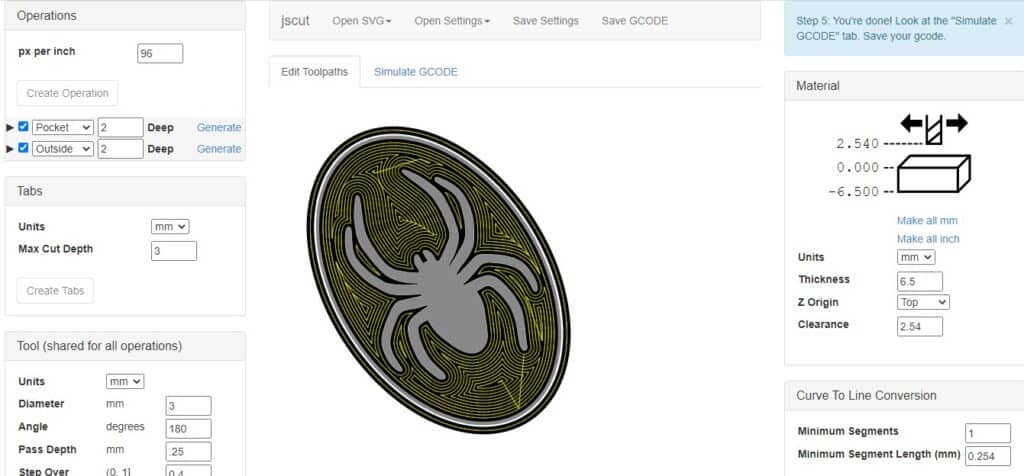
I made a basic program of a spider using JScut to test U.G.S on my 3018 engraver. (I have a JScut tutorial here).
Once you have connected your cnc machine you can upload your gcode by pressing ‘browse’ and locating your file.
Use the Jog functions to position your tool where you need your three axis datums to be. When in position, press the ‘Reset Zero’ button to set all 3 axes datum positions.
When the datums are set, press your ‘home position’ macro and if you set it up as shown above, your machine will move back to its home position.
Visualize
When your Gcode is loaded, press the ‘visualize’ button and a separate window should appear showing your toolpaths. If it looks good you are ready to run.

Run your G code program
Once your program is loaded simply click ‘Send’ and the machine will run the program.
Pressing ‘Pause’ will halt the movement of the axes without stopping the spindle.
If you encounter a problem and need to stop the program just press cancel and the machine will stop completely. You can then press ‘Home Position’ macro command to send the machine home, away from the stock material.
If you want to restart, click ‘soft reset’ to clear any active modal commands before pressing ‘Send’ again.
Final Thoughts
Just like Candle, this software was easy to use, it is simple and intuitive and ideal for a newcomer to Cnc.
It also has some advantages over Candle software, especially being able to change the readouts to display in inches as well as MM.
I do think this software has an edge over Candle mainly due to my preference of programming in inches. But they both work just as well as each other, so I would suggest trying both and making your own decision.
Universal Gcode Sender is free software so it can’t really be faulted, you can also use it on an apple mac, as well as linux and windows.

