What is candle software?
Candle GRBL software is free to use, basic CNC machine control software. It is very uncomplicated and as such is perfect for a beginner.
It incorporates a G-code visualiser and only has the essential functions you need for running your G-Code programs.
Although only having a minimum of functions can be limiting, it drastically reduces the ‘information overload’ that can occur if you are still unfamiliar with Cnc machining.
What type of CNC machines use Candle Software?
Candle uses GRBL source code which software can be run using Arduino hardware. So any cnc machine that has an Arduino controller and no more than 3 axes (X, Y and Z), can use Candle software to control it.
This type of software is only intended for hobby use, so is mainly used on diy cnc home conversions and small consumer grade cnc routers and mills.
Most of the 3018 style Cnc engravers come equipped with Arduino clone hardware so they will be delivered with copies of Candle or other Grbl based software to control these machines.
I use Candle for my 3018 pro machine and I have a full review of this machine at this link, 3018 review.
Candle Cnc Tutorial
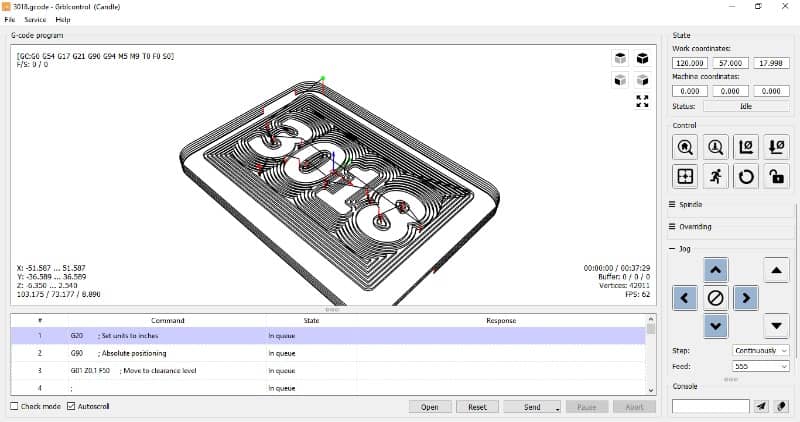
First off I will go through and explain each area of the user interface and how to use each feature.
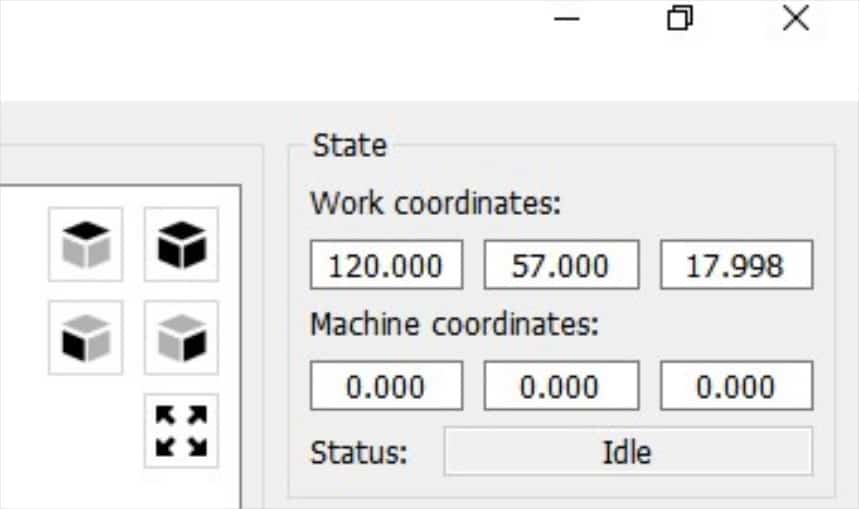
State
This section shows the position of the spindle in relation to the work coordinates (datum offsets) and the machine coordinates (machine reference point or machine home position).
If you need more information on this, read the article ‘cnc offsets and machine reference explained’.
For basic cnc machines the machine coordinates will be located where the spindle is located when the machine is switched on.
I recommend establishing a home position at the positive end of each axis travel, homing the machine to this position at the end of each program and before you switch your machine off.
See my article ‘Cnc limit switches – Why you don’t need them!’ for a more detailed explanation.
Control
The first button is the ‘home Button’. When correctly set up, the ‘Grbl candle home’ function will home your machine to a predefined point, this can be used if your machine is equipped with limit/home switches.
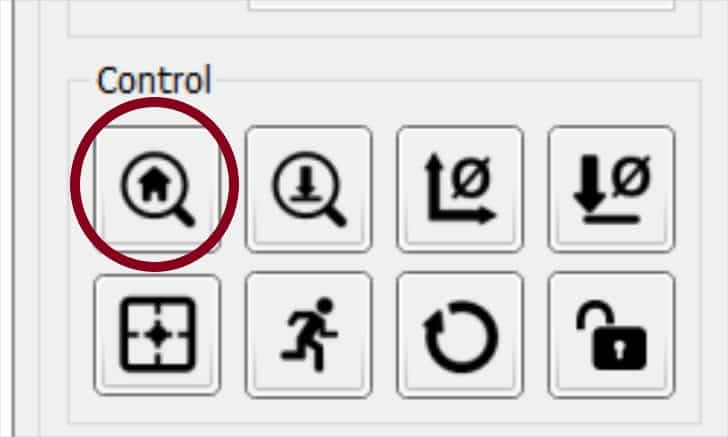
If you have a basic machine, like a 3018 engraver that does not have limit switches, you can ignore this button and use ‘safe position’ instead. I explain how to use it as a homing function later in this article..
The next control button is Z-probe. The Arduino control board has the ability to connect a probe.
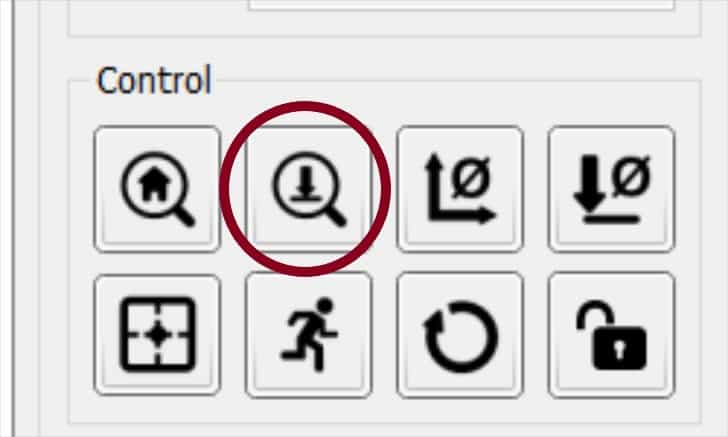
If you have one connected and it is set up correctly, pressing this button will probe the top of your part and set this as your Z datum.
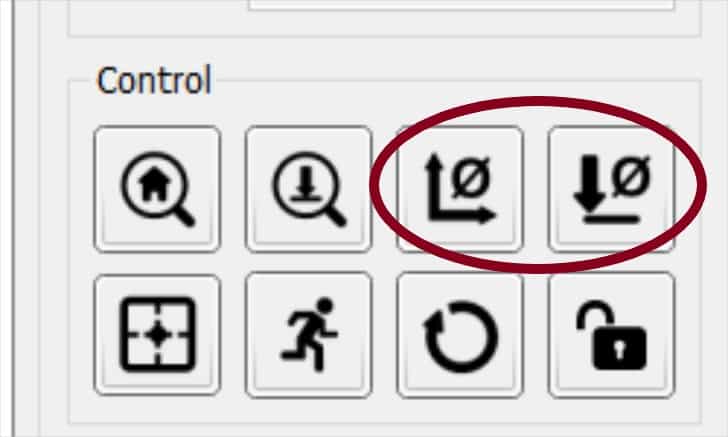
The next two buttons are Zero XY and Zero Z, pressing these will set your work coordinates to where your spindle is currently positioned.
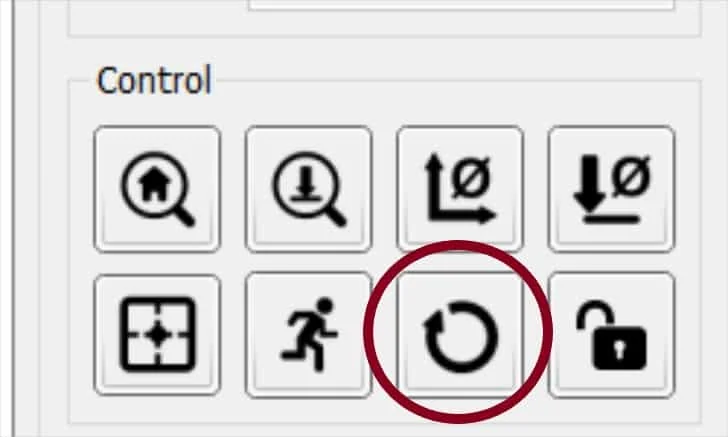
Moving to the lower row of control buttons, the first one is ‘restore origin’. Pressing this will restore your previous work offsets using a G92 command.
This is needed if you hit reset as doing this will clear your work coordinate positions, pressing restore origin will reinstate them.
This function can even be used after turning your machine off and back on again, as long as you returned your machine back to its home position before turning it off.
Note: I have had an issue recently where Candle is not remembering my last used offsets and the restore origin command has not been working.
If this happens to you, I have published a workaround for re-establishing your previously stored offsets. Candle software offset problem.
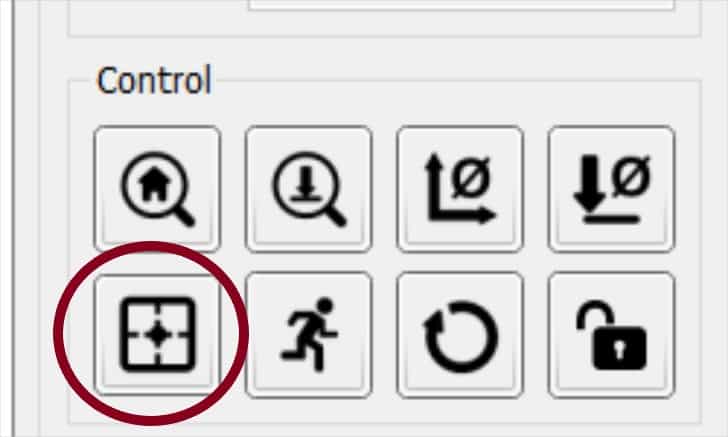
‘Safe Position’ will move your machine axes as specified in the settings dialog box under safe position commands.
This can be used as your home position button if your machine does not have home/limit switches. Just open the settings box and type “G53G00G90Z0.;G53G90X0.Y0.” in the safe positions command box.
You can now press this button and your machine will travel to its home position.
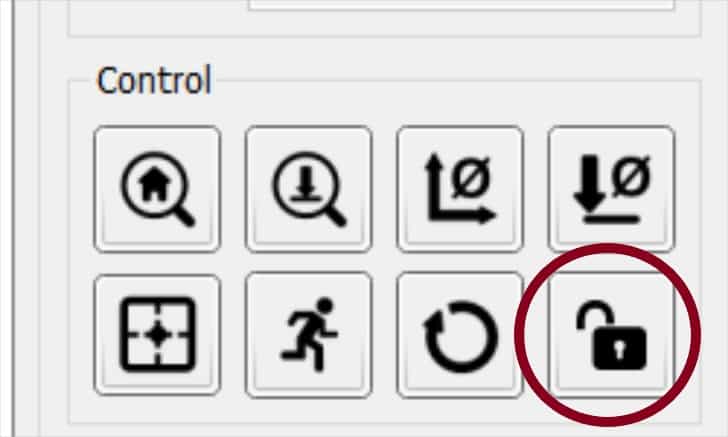
Reset is the equivalent of an emergency stop. Press it and your machine will stop the spindle and any axis movements.
Unlock is used to get your machine going again after pressing reset.
Spindle
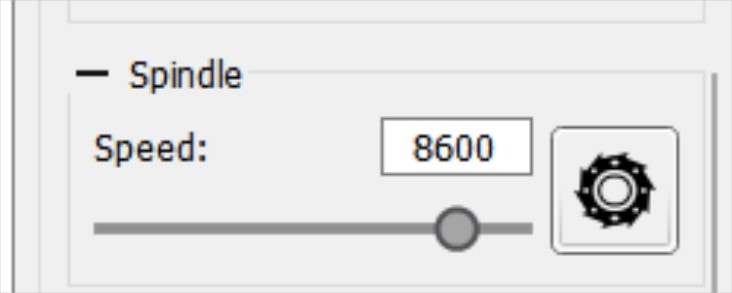
This section lets you switch on your spindle manually and control the spindle speed. You can manipulate the slider to reduce or increase the RPM. This is used only when manually switching on the spindle, not when running a G code program.
Overriding
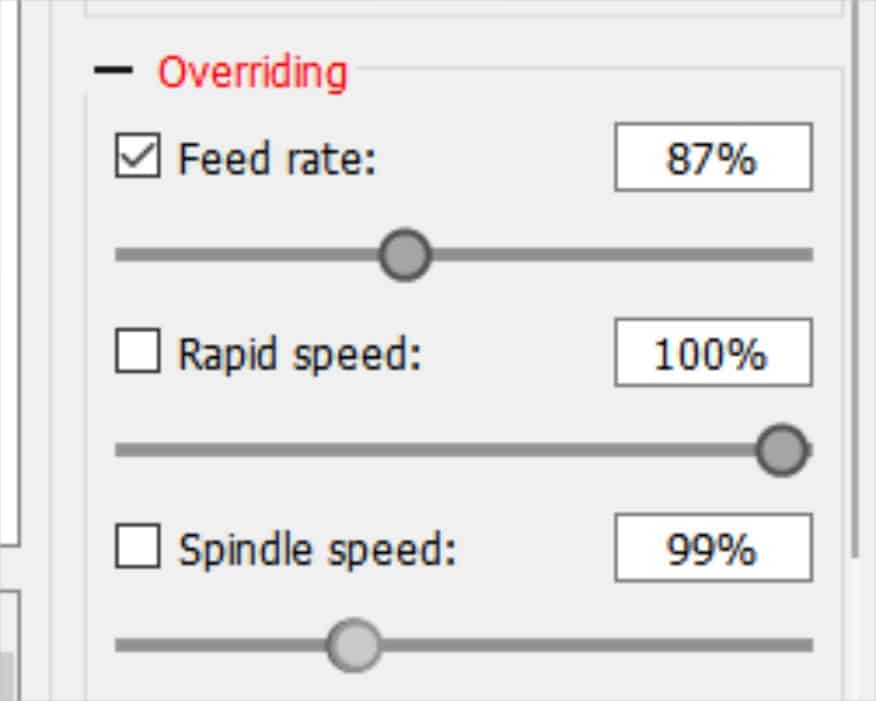
This section lets you manipulate the feedrate, rapid feed and spindle speed while running a G code program. This is really useful to help dial in your feeds and speeds to prevent tool breakage or overstressing a 3018 machine.
To use it, adjust the slider then check the box to make the change active.
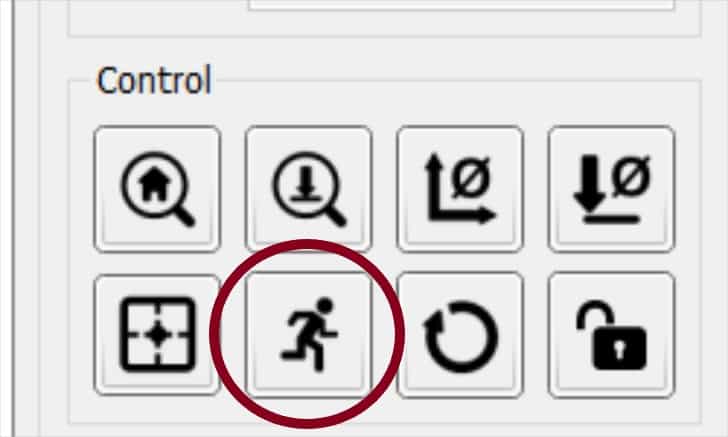
Jog
The Jog section lets you manually control your machine’s 3 axes. The 4 direction buttons on the left control the X and Y axes and the two solid arrows on the right control the Z axis.
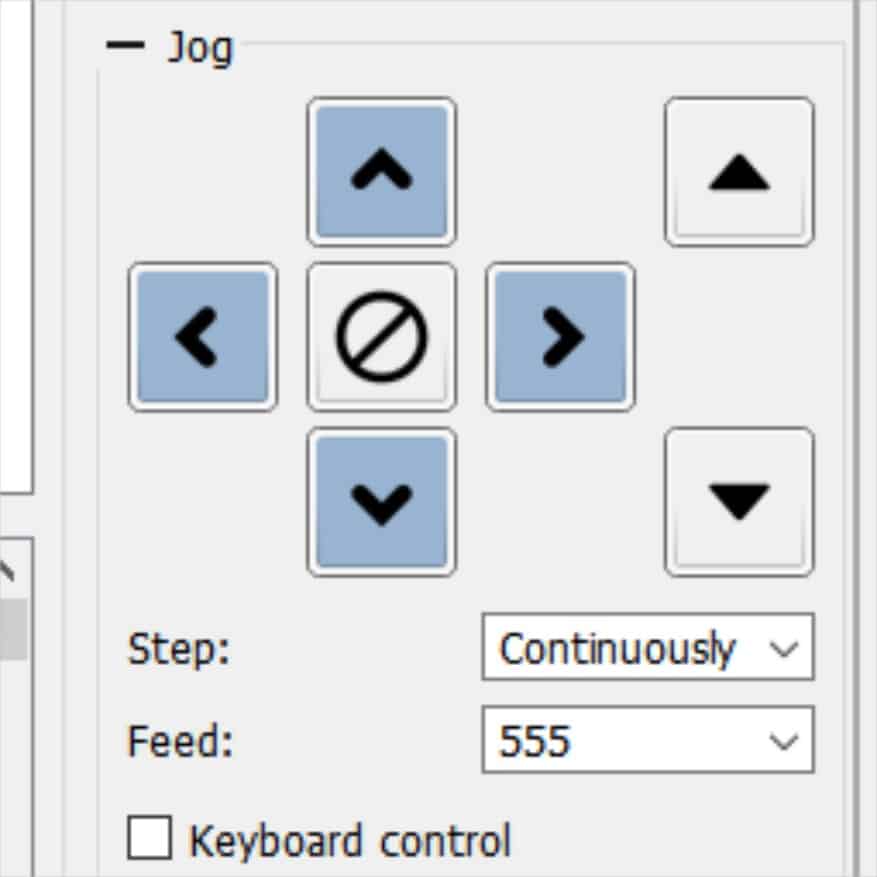
The ‘step’ drop down menu gives you the option of controlling the axis movements in different ways. Selecting ‘Continuously’ will move the axes continuously while the direction button is pressed. The movement will stop when the button is released.
The other options are all incremental movements, all shown in millimeters.
Choose a distance you want to move and pressing a direction button will move the axis the chosen distance.
There is a stop button in the center of the X Y direction buttons if you need to prevent a crash.
The next choice is the feed, select your feedrate, for example a slower feed, allowing for finer manual control.
The final option is a checkbox for enabling keyboard control. The controls to move your axes are as follows, (Thanks to Giulio for the information)
NUMBER PAD 8 = Y+
NUMBER PAD 2 = Y-
NUMBER PAD 4 = X-
NUMBER PAD 6 = X+
NUMBER PAD 9 = Z+
NUMBER PAD 3 = Z-
NUMBER PAD 5 = STOP
NUMBER PAD 7 = STEP LENGTH +
NUMBER PAD 1 = STEP LENGTH –
NUMBER PAD / = SPINDLE SPEED –
NUMBER PAD * = SPINDLE SPEED +
NUMBER PAD 0 = SPINDLE START / STOP (1)
Make sure you don’t check the box by mistake, having it checked will prevent you from using the console.
Console
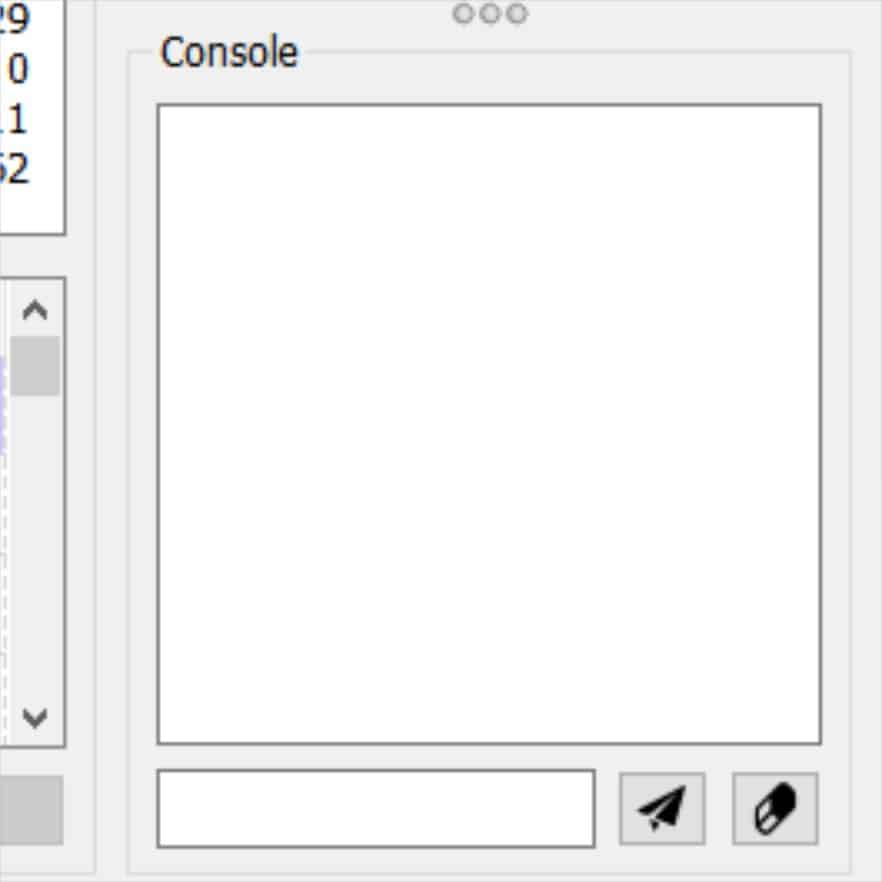
This area will show you the commands that are used when you press any of the control buttons. It is also used as an MDI screen.
Manual Data Input allows you to type individual lines of code and execute them independently of any G code program loaded.
Load your G Code program
A program needs to be created first, you can check out my JScut tutorial for help on this.
Once you have your program, you can click ‘open’ or ‘file’ > ‘open’. This will put your program in the ‘queue’ ready to be sent to your machine when you press ‘send’.
The first few lines of the program should be visible in the bottom section of the screen.
You can run a G code program in either metric or imperial but Candle will only show millimeters in the ‘state’ readouts. There does not appear to be any way of changing this.
Running an imperial G code program will produce a correctly sized project as long as the G20 code (inches) is specified in your program.
Setup your Cnc Machine
I’m demonstrating this tutorial with my 3018 machine that I bought for my full review and setup tutorial. The 3018 cnc engraver came bundled with Candle software so if you are considering buying one of these machines I suggest you check out my review.
Use the Jog functions to position your tool where you need your three axis datums to be. When in position press the Zero XY and Zero Z buttons.
When the datums are set, press ‘safe position’ and if you set it up as shown previously in this article, your machine will move back to its home position.
Run your G code program
Once your program is loaded simply click Send and the machine will run the program.

Pressing Pause will halt the movement of the axes without stopping the spindle.
If you encounter a problem and need to stop the program just press Abort and the machine will stop completely. You can then press ‘safe position’ to send the machine home, away from the stock material.
If you want to restart, click reset to get back to the beginning of the program before pressing Send again.
Candle Visualizer
The tool paths in the visualizer can be manipulated with your mouse in the usual way.
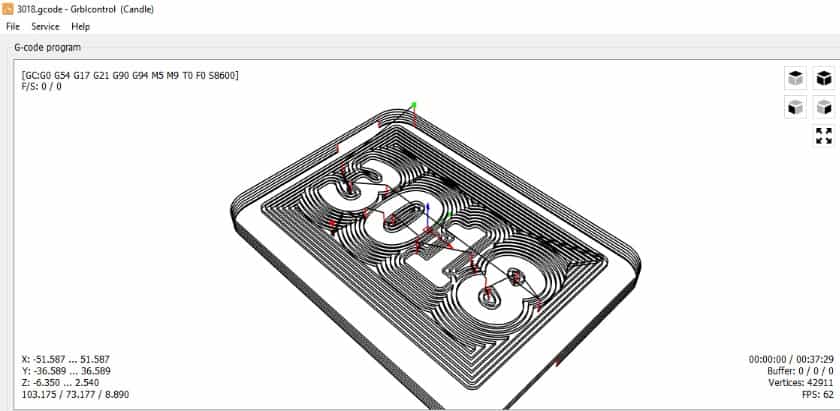
Rotate the paths by holding down the left mouse button and moving the mouse, hold down the right button to pan and roll the scroll wheel to zoom in and out.
There are also the icons in the top right of the visualizer window to position the toolpaths in the typical viewport positions.
Final Thoughts
I found this software a breeze to use, it is so simple and intuitive that it is perfect for a newcomer to Cnc. It isn’t perfect and has some shortcomings, especially not being able to change the ‘state’ readouts to display in inches.
This software is perfect for use in conjunction with JSCut and other basic G Code generating programs.
I did experience a few glitches when I first started using it. The main issue being the machine tried to do a rapid move beyond its limits after pressing ‘abort’ and ‘restore origin’. (It isn’t supposed to move at all).
I’m not sure what I did to get it running properly, but it works fine now.
Candle is free software so it can’t really be faulted, you can download it here.
If you need a G Code file to test your machine, I have some files available for anyone to download. The files have step by step instructions provided.
OR