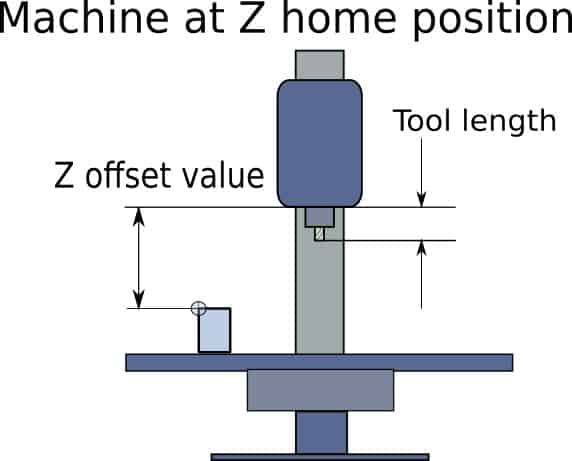
As the name suggests, tool length compensation enables a cnc machine to compensate for many tools of different lengths. It allows a machinist to set a Z axis datum on a part and use multiple tools without having to reset the Z datum for each tool used.
This function is needed when a cnc machine has a tool changer and a magazine that holds many different types of cutting tools. An operator may need to use a lot of these tools in one program.
The machine can change tools automatically, enabling the machine to finish the part quicker than if the tools were changed by an operator. All the tools are loaded in interchangeable chucks or arbors with a standard taper clamping system that all cnc machine tools use.

Tool length compensation G codes
- G43
- G44
- G49
G43
The G43 Gcode is the most commonly used command to activate tool length compensation.
This command will be accompanied with a “H” value to tell the machine control software which compensation value to apply.
An example line of code will look similar to this:-
G43 H2 Z1.
This line will activate the tool length value H2 and move the tool 1” above the z datum. The H2 value would have already been set by the operator when the tool was set up.
The H value number is usually associated with the tool number, i.e. Tool 2 will have its tool length stored in the H2 value block in the tool offset page.
The H values are all positive so it will compensate the Z axis position in a positive direction, moving the machine the exact length of the tool away from the workpiece.
Using multiple tools means the Z datum has to be set to the face of the spindle without having any tool loaded.

G44
In thirty years of being a cnc machinist I have never used G44, so I’m going to take a stab in the dark and suggest you will never need it also. I had to google it and it sounds counter intuitive. Maybe there is a very specific type of machine that it makes sense to use it on. I’m going to pretend it doesn’t exist, you should too.
G49
G49 is the tool length compensation cancel command.
It cancels it.
This command is usually only used in a safety line at the beginning of a program.
The reason you don’t need to use it is because the active tool compensation “H” value gets cancelled when you activate the next “H” value.
Also any active “H” value also gets cancelled at the end of a program with an M30 command.
(The M30 command tells the machine the program is ended and to stop and go back to the start of the program.)
Your cnc machine does not have a tool changer…
So given that this website is about cnc machining as a hobby, I’m sure you are saying, “ my machine does not have a tool changer, what do I do?”.
Well, that’s easy.
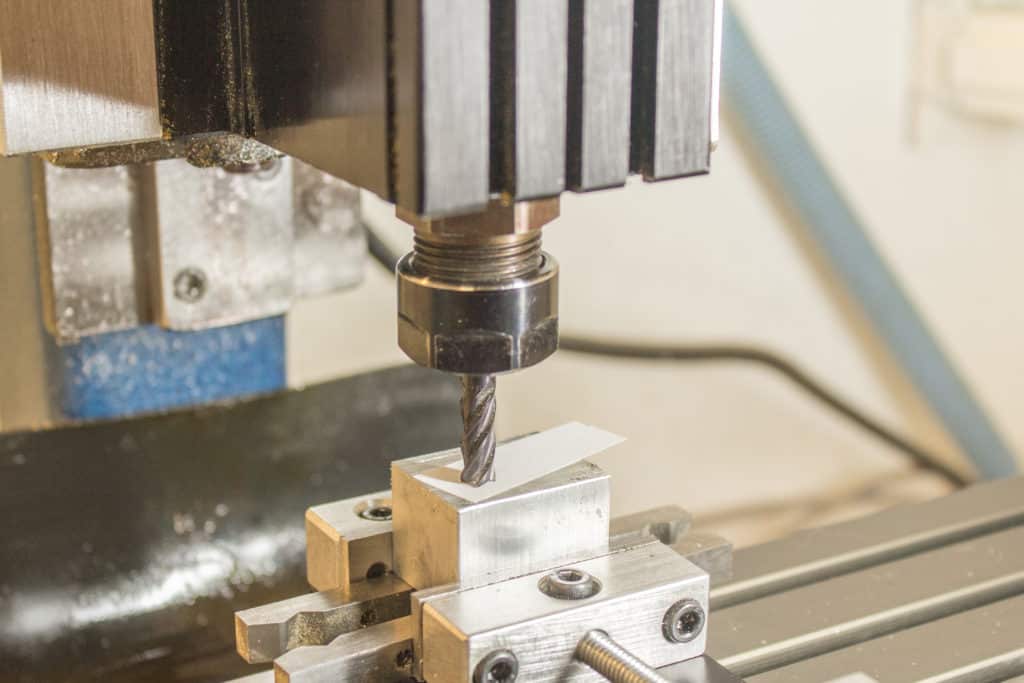
All you do is load the tool you need to use in the spindle and touch the bottom of it on the face of the part you want to set as the datum. When it is in position at the Z datum face you can store that position in the datum offset page. Then, in the tool length offset page, make sure the value is set at zero.

Then you can still use the G43 Gcode command and an H value, as you would if your machine has a tool changer.
The reason you should do it this way is because it is a good habit to get into and if you use a Cad/Cam program the post processor will probably create the program using these commands anyway.

How do I check my Z datum value?
Every once in a while most machinists will crash their machine. It happens and it is not a good experience. A common cause of these crashes is forgetting to set your tool length or your Z datum.
A good habit to employ is by programming a Z safety line.
Most Z datums are set to the top of the part so by making your initial Z move to a set position above the part will enable you to check this distance. For example the sample code I showed you before looked like this:-
G43 H2 Z1.
If you make the machine stop after it has executed this line of code, it should be 1” above the part. You can stop the spindle and check that distance with a 1” gauge block or a 1-2-3 block.
If the cutter is exactly 1” above the datum face you know you have set your datum and tool length correctly.
Using a safety line when using rapid moves in between milling or drilling will prevent you crashing into clamps or fixturing. Just make sure you program your safety line higher than any obstacle.

What do you do if your datum reference face gets machined away?
Occasionally you may face a situation where the roughing passes will completely remove the top face that you used to set your Z zero datum, preventing you from setting the Z datum for the remaining tools.
When you change to your next tool you can set the Z datum by using a separate reference face.
All you have to do is plan ahead.
Prior to roughing away the reference face of the part, choose an accurate square block such as a 1-2-3 block, place it on the machine table and record the height difference to your datum.
You can use your machine to measure the distance by touching the Z datum face, then zero the relative distance on your machine software (e.g. mach 3), then touch the top of the reference block.
Make a note of the distance. This block can now be used to set the Z datums for the rest of the tools you need to complete the job.


