This article will give you a tutorial on one of the most popular software downloads for operating a GRBL controlled Cnc Laser Engraver.
GRBL is open source software that was created to control the motion of cnc machines. This encouraged the development of DIY machines for everyone to use with their home computer.
Depending on the type of cnc machine you have, you will need user interface software that suits your machine’s specific needs.
So if you have a GRBL milling machine, Candle or UGS software programs are available. But if you have a cnc laser engraver you will need LaserGRBL software which can make the most of a laser’s unique abilities.
LaserGRBL
There are a few free laser engraving software downloads available but one of the most popular of these programs is laserGrbl.
LaserGRBL is open source laser engraving software which is free to download and use. (Always use the latest version of the software.)
This free software has many useful functions, but one feature I want to highlight right away is its ability to create G Code.
Unlike Candle and UGS software for a GRBL milling machine, LaserGRBL is the only software you will need to start using cnc Lasers. Just choose a digital image you want to engrave, adjust a few parameters, and the software will do the rest.
Reading through this tutorial will teach you enough to get started creating your projects using LaserGRBL.
It is available from Github, just click the link. LaserGRBL here.
Connecting Your Cnc Laser Engraver
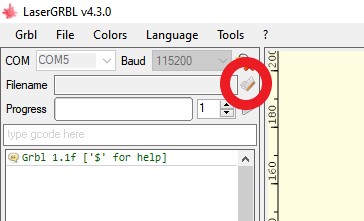
The first task is to connect your machine with a usb cable from your computer and have the machine powered up so the software can detect it. Then you have to select the correct com port and Baud rate.
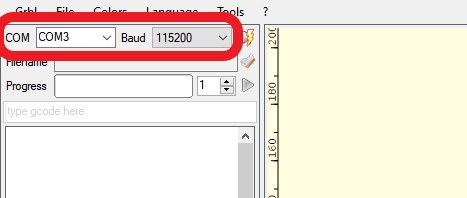
If you already use your pc for another machine these should be the same. The Baud rate has to match the setting in your control board’s firmware. Usually 115200.
You can cycle through the available com ports until you find the correct one. Clicking the connect button will result in a sound confirming the connection.
I have had it fail to connect occasionally, the fix was to have the machine connected and powered up first, then start LaserGRBL.
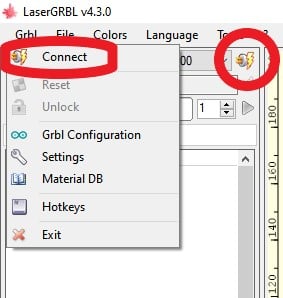
The connect button is located in two different places. It is displayed as a small icon next to the baud rate and in the Grbl drop down menu.
Loading a file to engrave Your Project
There are two load file options, again a small icon next to the file name and one in the ‘file’ drop down menu.
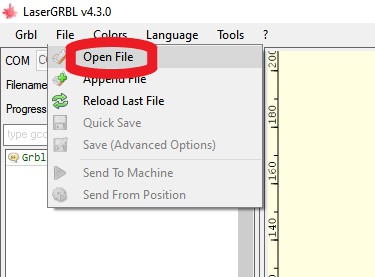
Navigate to the file you want to load and click open.
In this example I am opening a jpeg file. Image files are classed as raster files, SVG files are not, so the options will be slightly different for SVG.
Opening an image file, you will be presented with an import raster image box with some adjustable parameters.
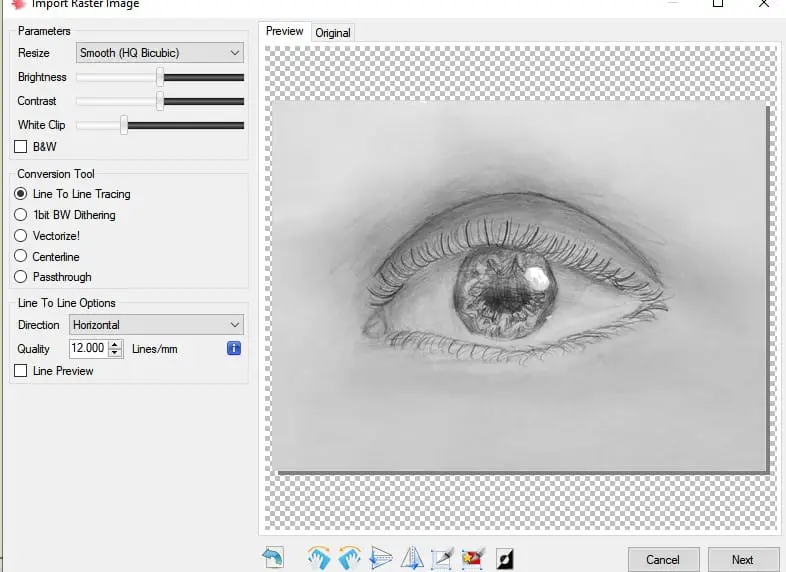
Most of these parameters are visual adjustments and are very much a ‘what you see is what you get’ adjustment. So depending on what type of image you have loaded you can play around and test all these to get your desired effect.
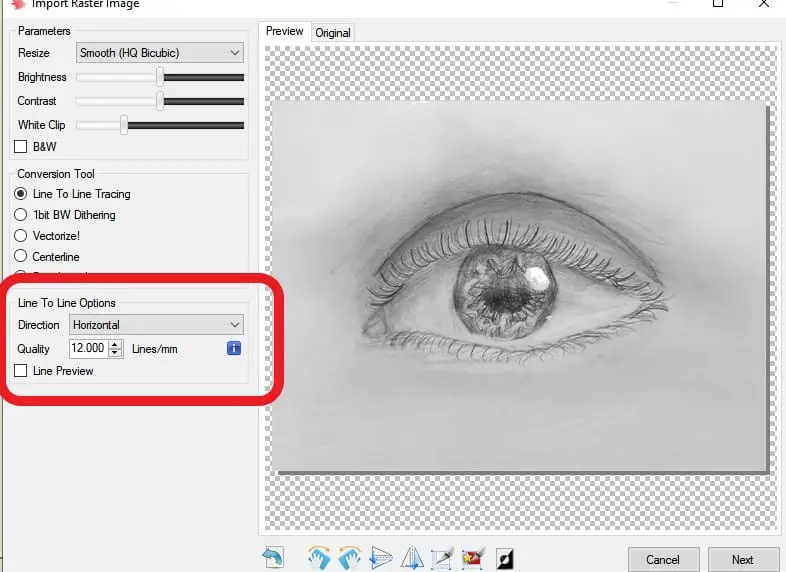
One setting I want to explain is the ‘line to line options’ when the ‘line to line tracing’ is selected. The ‘quality’ setting dictates how many lines per mm the laser beam will step over, so increasing this value will improve the resolution but increase the run time. A setting of 12 will give you a reasonable compromise between the two.
When you are happy with the way your preview looks, press next and a ‘target image’ options box will appear.
(If you opened an SVG file, you will be taken straight to the target image pop up similar to the one below.)
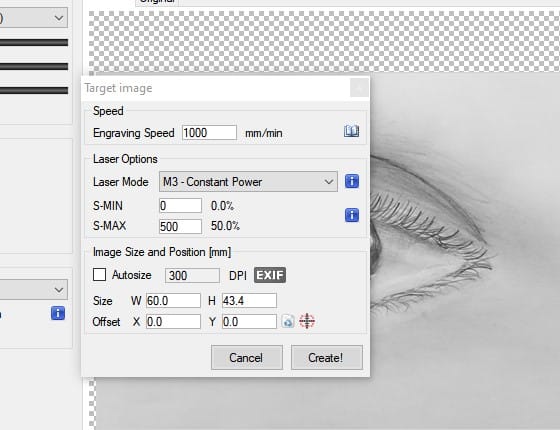
Speed
This setting dictates at what feed rate the laser will travel at. This can be dependent on what material you are using as your stock, whether you are cutting or engraving and how much power your Laser is outputting.
To the right is a small book icon, click this to bring up your materials database. You can load recommended baseline settings for your laser and material from here.
Laser Beam Power Options
The first option to choose is ‘Laser mode’.
M3 – choose this option if you want to “laser cut”, e.g. cutting out a profile, this is constant power.
M4 – Choose this option if you are engraving a picture, the power can adjust as your machine slows down to change direction, this prevents uneven greyscale shading . Hence the term Dynamic power.
The next options to decide on are your Min S value and Max S value.
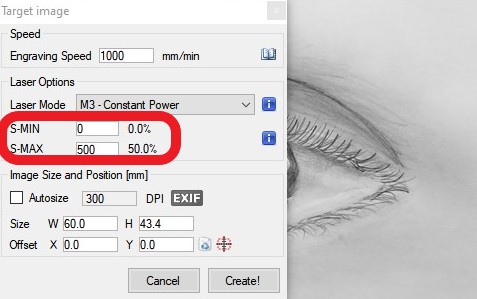
The S value controls the power output of the laser module. The maximum setting you can have is dictated by the settings in your firmware. For example the 3018 cnc machine comes from the factory with a max S value of 1000. This value of 1000 represents 100% power, so S100 will equal 10% power. Some machines have a max S value of 255. If you are unsure, check your firmware settings.
Setting these max and min values allows you to control the power for different materials. For example, If you wanted to cut out shapes in paper you could reduce the max value to prevent burning the paper.
Image Size and Position
This next option allows you to control the size and position of your engraving.
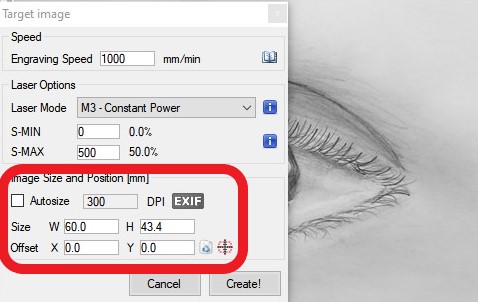
Checking the ‘Autosize’ box will pull the size information from the picture.
If this is not the correct size for your stock, just type in your desired size in MM.
The software will keep the image size ratio as the picture was originally imported.
Offset
The software will always position the X Y zero datums at the bottom left corner of the picture. You can use the X and Y input boxes to move where the picture will engrave in relation to your machine’s zero datums.
If you have set your machine’s datum in the middle of your stock, just press the small center icon to the right of the offset boxes to move your picture to the center.
When you are done, press Create.
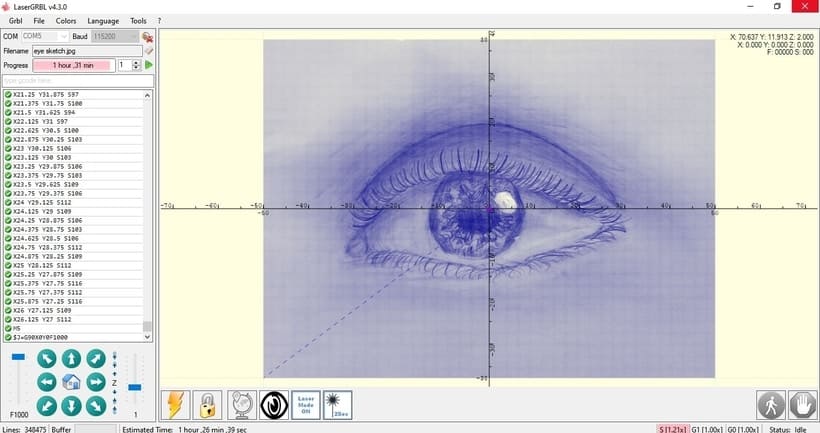
Once your PC has processed the file and created the G Code all you have to do is press the play button and your machine will engrave the picture. Easy!
The Laser I used was a Sainsmart Blue Laser Module, You can read the review here.
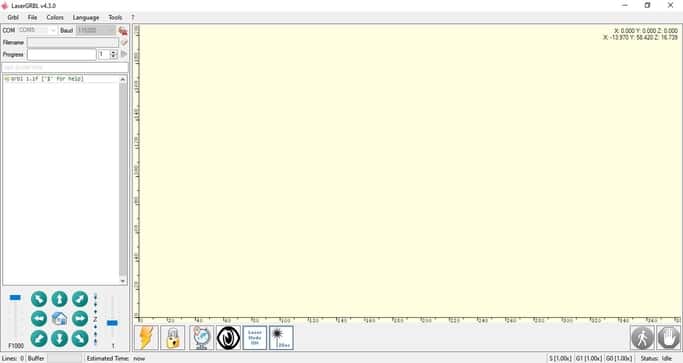
Laser GRBL Menu Functions
Here is a run down of the functions in LaserGRBL, starting in the top left of the User Interface.
GRBL drop down menu.
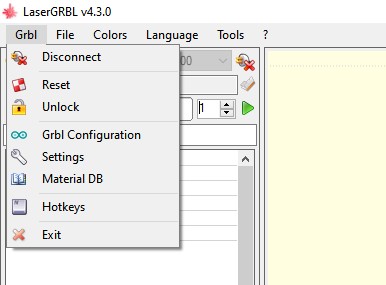
Connect
This button connects the software to your machine. Once connected it will change to disconnect and the machine status will show as idle.
Reset
Press this to reset your machine.
Unlock
If you have an alarm status you can press this to unlock your machine to idle. Typically a machine in an alarm state needs to go through a homing cycle.
The homing function needs to be active in your firmware for the homing option to show. That’s why you cannot see this in my drop down menu.
GRBL Configuration
This option shows your machine’s firmware settings. These can only be edited when the machine is connected.
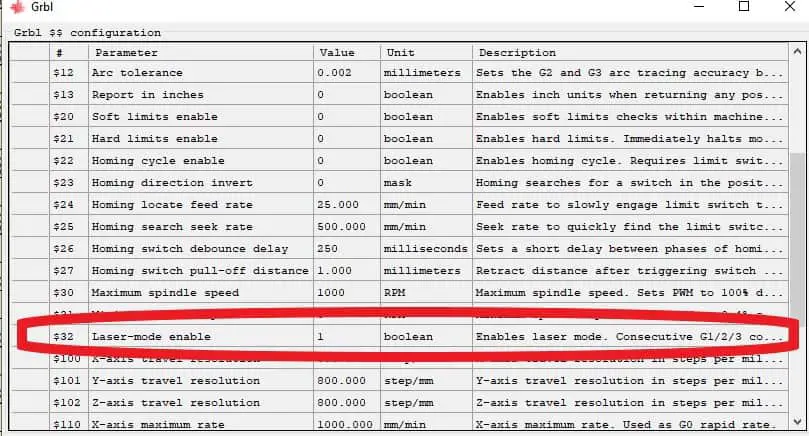
If you are adding a Diode Laser Engraving Module to a 3018 cnc machine the most important setting you need to change is $32. This needs to be set to 1, ‘laser mode enabled’. This commands your laser to switch off during rapid moves, unlike a milling spindle which keeps spinning.
Also if you have a machine that needs to be homed, homing cycle $22 needs to be active.
Settings
Protocol
All of these settings can be left alone unless you are using one of the alternative control boards instead of GRBL

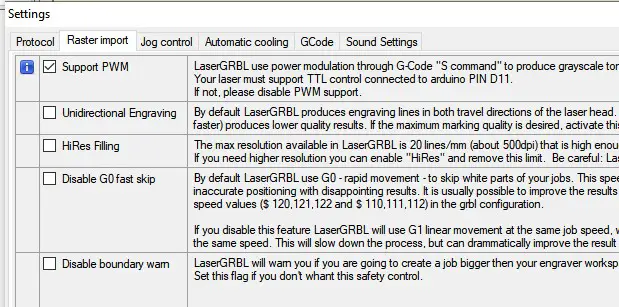
Raster Import
Support PWM needs to be checked to enable the M4 option for engraving pictures.
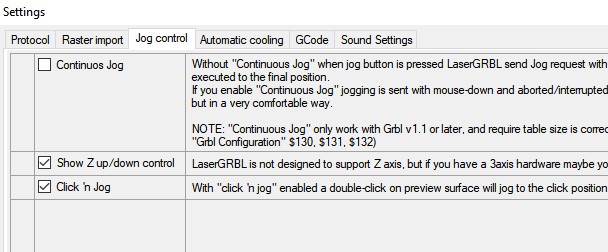
Jog Control
If you have added a Laser Module to a 3018 cnc machine or similar you have to check the ‘show up/down jog control’. This enables you to move the Z axis up and down to help focus the laser. Checking this option will show the jog controls in the user interface.
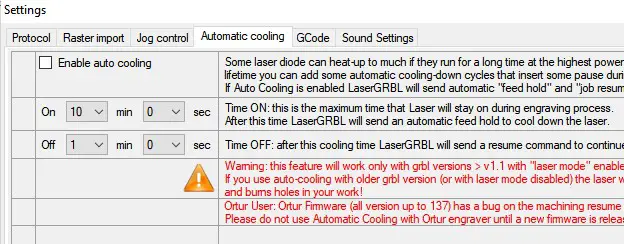
Automatic Cooling
This option enables the machine to pause after a predetermined time to help prevent lasers overheating.
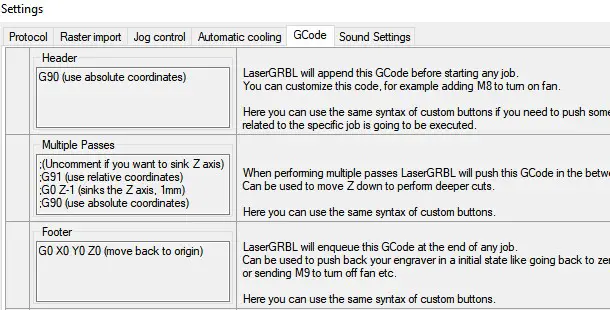
G Code
This section sets the header and footer code that is inserted into the G Code programs.
It also lets you control the depth of multiple passes if commanded.
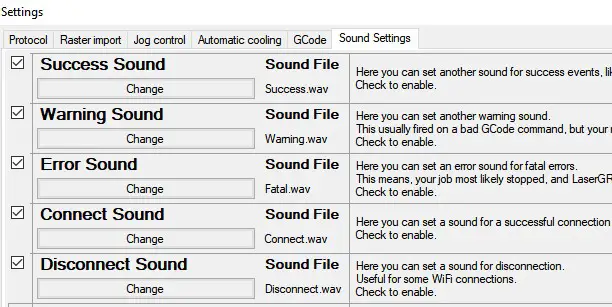
Sound Settings
You can turn the sound settings on and off.
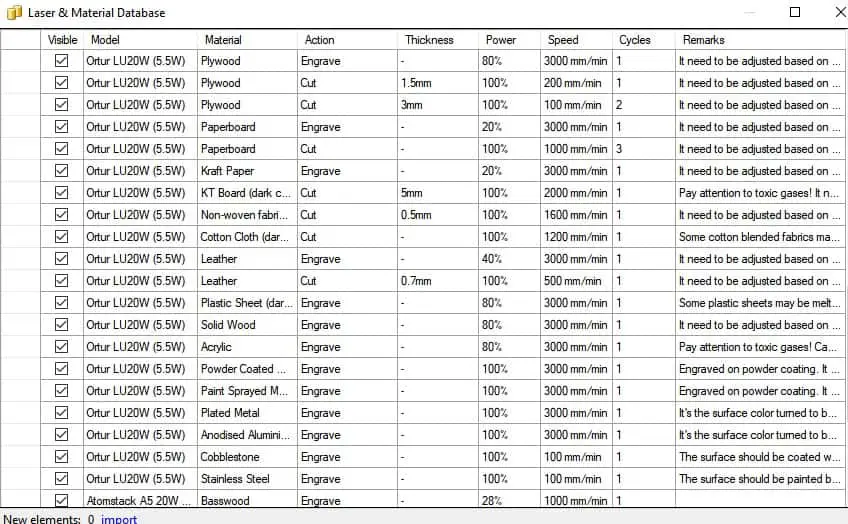
Material DB
Selecting this option brings up a useful table of suggested settings for different materials and Laser modules with different power outputs. These will give you a good starting point for your settings.
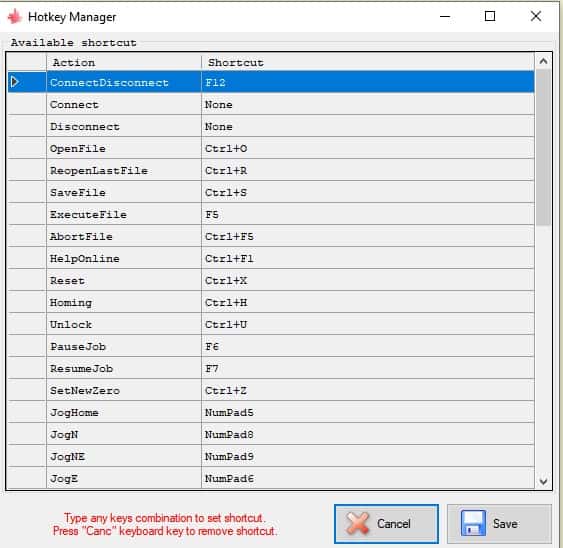
Hotkeys
Last on the list are the hotkeys, you can change or remove your hotkey settings here.
File Drop Down Menu
Open File
Click to browse to load your file.
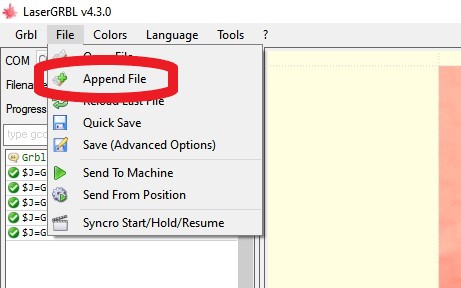
Append File
Click this when you want to add additional files to your workspace.
Reload Last File
Reloads the last file you loaded, so you don’t have to navigate to the folder again.
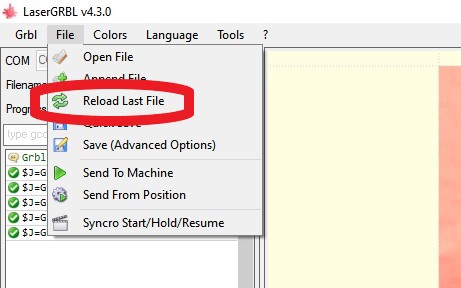
This option is useful if you want to re-edit the picture you are currently working on. To go back to the previous ‘import raster image’ box, just click reload last file.
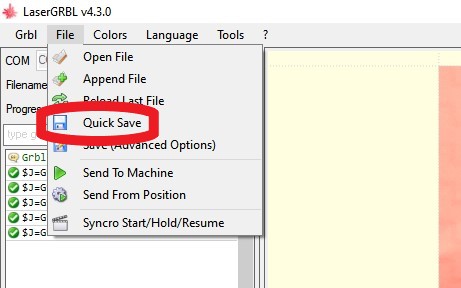
Quick save
This option lets you save your current file as a G Code file, you are saving your current job with all your settings for use again.
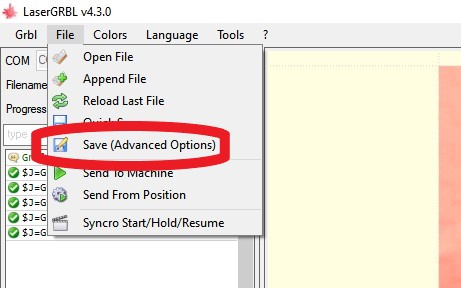
Save (Advanced Options)
This is the same as quick save but gives you the option to remove the header or footer and increase the amount of passes. I guess this is for exporting the G Code for a different machine and software.
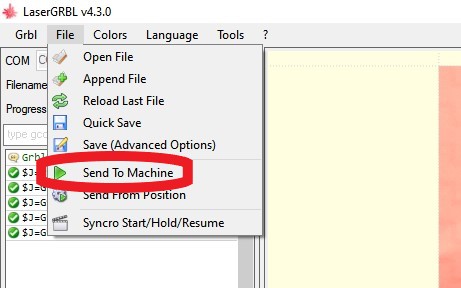
Send To Machine
Sends the program to the machine
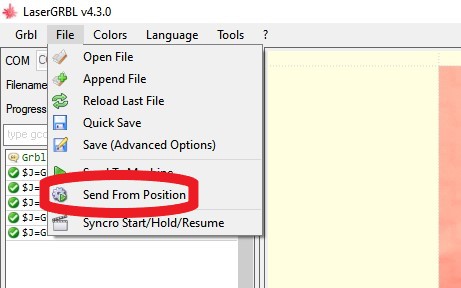
Send From Position
If your machine stops for any reason, (power outage etc.) and you know what line of code it stopped at you can restart from that line using this feature. (I have not tested this)
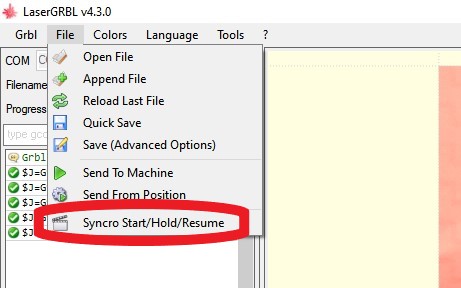
Synchro Start/Hold/Resume
Pauses and restarts your program.
Colors Drop Down Menu
Here you can select the color of the user interface.
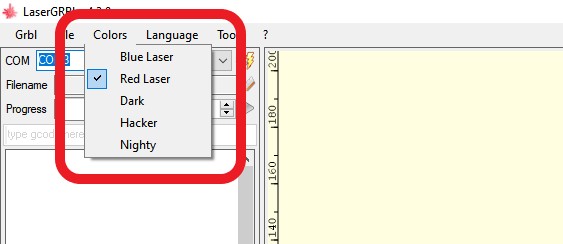
The blue laser and red laser options help you see the screen properly when you have your laser safety glasses on. Choose the color that works best with your glasses.
Tools Drop Down Menu
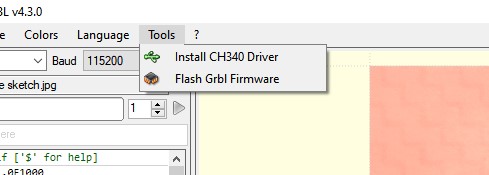
Install CH340 driver
Use this option if you have not yet installed your GRBL driver.
Flash GRBL Firmware
Use this to reflash your firmware. Only use this if you know what you are doing.
Jog Controls
The jog controls are located in the bottom left corner. Click on the direction buttons to move your machine around. The home button will send your machine back to it’s X and Y axis datum zero position.

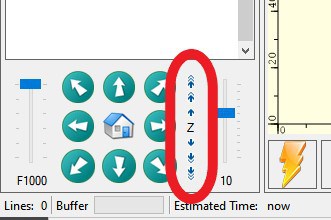
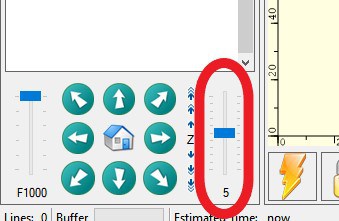
Z Axis Up/Down Controls
Control your Z axis with the arrow buttons. Hover your mouse over the arrows to see how much movement you will get from each different arrow. This option is useful for fine tuning the focus of your Laser.
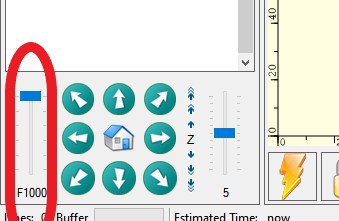
Feedrate Slider
The software will read your firmware to display your programmed maximum feed rate. This will be displayed here and can be reduced with the slider.
Jog Distance Control
Use this slider to control how far your machine will incrementally move when using the jog controls.
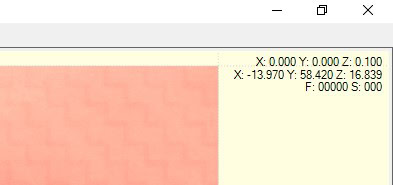
Machine Positions
In the top right of your screen are your machine offsets and your current position from your Datums (machine position). Also displayed are the current feed rate and laser power.
Machine Status
In the bottom right of your screen is your machine status.
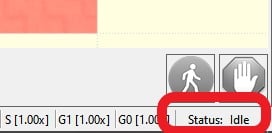
Different statuses will include:
- Disconnected
- Alarm
- Idle
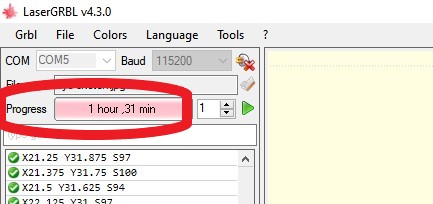
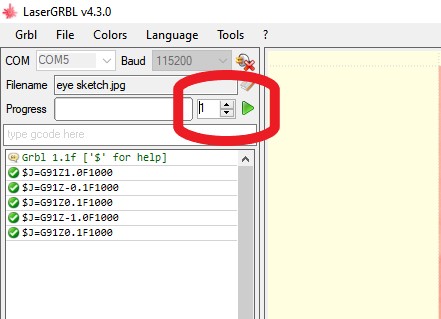
Progress Bar
This bar shows you how long a program has been running.
Use Repeats
Use this to tell the machine to repeat the program your desired amount. This is useful for cutting out a profile. Multiple passes may be needed to cut through your material cleanly, especially if it is thick.
Overrides
In the bottom right corner to the left of the machine status are your Power, feed rate and rapid move override sliders.
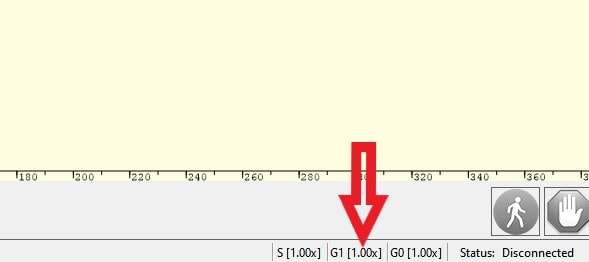
Simply click on any of those values and a box will pop up with the sliders. You can adjust these while your machine is running to fine tune the power and feeds.
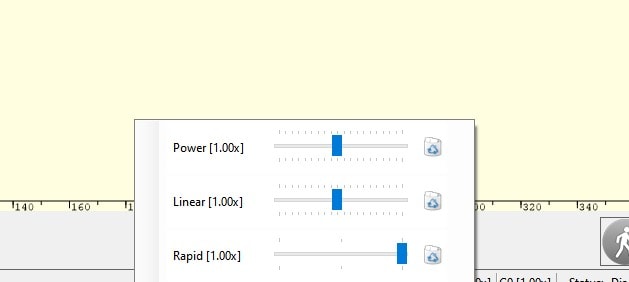
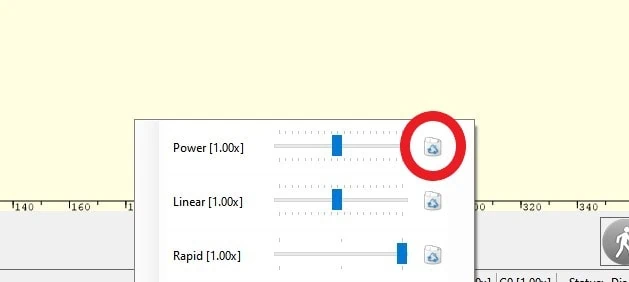
There is a small reset button for each value to the right, click this and the value will jump back to it’s default.
Softkeys
These are located at the bottom of the main screen and as default there is a reset button, a home button and a datum set button.
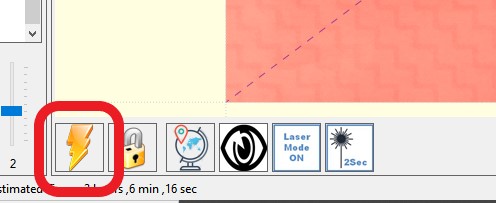

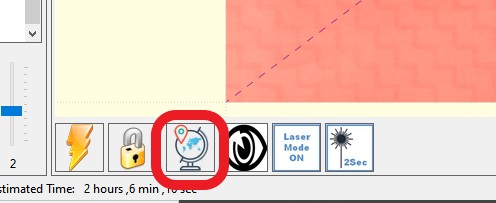
Custom Softkeys
There is room for more custom buttons, the three I have installed are from the sainsmart website and were recommended when you buy a blue Laser Module for the 3018 cnc pro machine.
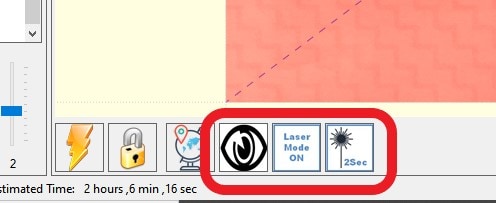
They include a button to turn on the Laser at low power so it can be focused. A laser mode on/off button for changing the value in your machine’s firmware and a button to turn the laser on for 2 seconds. This helps for confirming the datum position for each program you run.
Conclusion
How good is LaserGRBL? The only answer I can give here is excellent, it’s free, it’s easy to set up and it works. Get yourself some cut files and try it out for yourself.
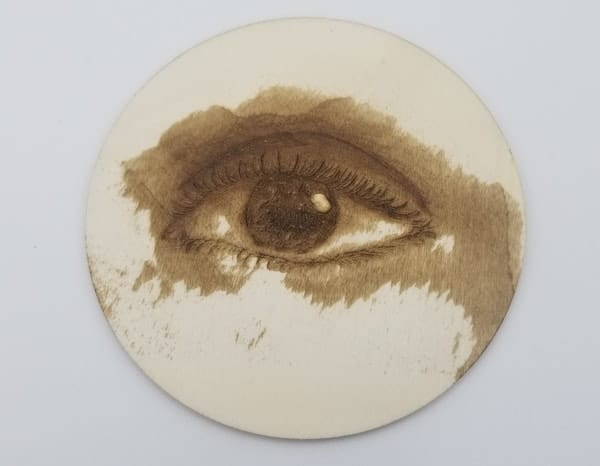
An engraver is perfect for decorating your project and as in my example, taking a drawing one of your children has done and creating a decoration or gift from it.
Are there any limitations? Yes, a few, you cannot use this software to create your own designs. This is not too much of a problem as there are other free software programs you can use for this, such as Inkscape.
Also you cannot import DXF files, you would have to use another piece of software and convert them into SVG files first.
The biggest issue in my opinion, is its inability to be able to combine engraving and a cutout pass in one program. It is not impossible to do if you export the G Code and combine two programs into one, but it’s still extra work.
LaserGRBL is still being improved by the creator and gets regular updates so this feature and others could be added in the future.
Recommended.


