This article contains an overview of what processes a machinist needs to complete a project successfully.
- Decide on your machining strategy
- Write a gcode program
- Using cad/cam software
- Upload the gcode to the machine control program
- Set up your cnc machine
- Run the program

The process of running a Cnc Machine
Decide on your machining strategy
Before you can make a part on your cnc machine you have to decide how you are going to make it. If you were to ask five machinists to make the same part, chances are that they would all take a slightly different approach to complete the task. (Each one would say their way is better:)
The approach you take can be highly dependant on what equipment and tools you have and what you are comfortable doing. There is no wrong way, especially if you are “making” as a hobby.
If you are designing your own part you will have to draw it. You can do this on paper or on a cad program if you have one. Drawing it out helps you visualise the part and gives you a good overview of how it needs to be machined.
Write a gcode program
The next step is to decide the easiest way to machine your part. Don’t try and do it in one operation if it is easier to complete it in 2 operations.
Doing this will give you a better chance of getting a well finished and accurate part. You will have to figure out how to hold the part for each setup and where to position your datums.
Once you have decided on each setup you will have to write your gcode program(s). These will be separate programs because your hobby mill will likely not have a tool changer. Maybe even several programs for each setup.
I have included a simple G code program below. It shows a drilling cycle.
G00 G17 G20 G40 G49 G80 G90 (safety line)
T5 M06 (5/64 drill) (call tool 5 and tool change command)
G00 G54 X-.13 Y.13 M03 (Rapid feed, use offset g54, pre-position in X & Y, spindle on)
G43 H5 Z1. (tool length offset 5, pre-position in Z)
G98 G83 R.1 Z-.3 Q.02 F3. (peck drill cycle at current location)
x.13 (drill at new location)
y-.13 (drill at new location)
x-.13 (drill at new location)
G80 (cancel peck drill cycle)
M05 (spindle off)
G00 Z2. (move up in Z)
G91 G28 Z0 X0 Y0 (go to home position)
M30 (end program)
You could combine all the programs into one but it will be less confusing to keep them as short and simple as possible. I like to separate the programs based on the tool I am using. If I need to change to a different tool I will create a different program for that tool.
To write a simple gcode program you only need a simple text editor and some basic knowledge of G code programming and Cnc terminology. I like to keep a folder on my PC full of sample programs so I don’t have to completely rewrite each program. All I have to do is pick a program that does a similar process to what I need, copy it and edit the numbers.
Doing it this way encourages you to get better at writing and understanding gcode programming and it can be quicker than using cad/cam software, if it is a simple process.
If you don’t want to write your own G-Code you will also need cad/cam software. An extremely basic G-Code generator can be found in Inkscape. I have a tutorial called ‘Inkscape G-Code Tutorial‘ if you want to try this out.
Using cad/cam software
If you don’t want to write your own gcode program or your part has a complex shape or form you will have to use cad/cam software.
Cad is an acronym for computer aided design (or drawing) and you will use a cad program to draw (or design) your part or profile. When you have drawn your profile you can save it as a digital file that can be read by your cam software.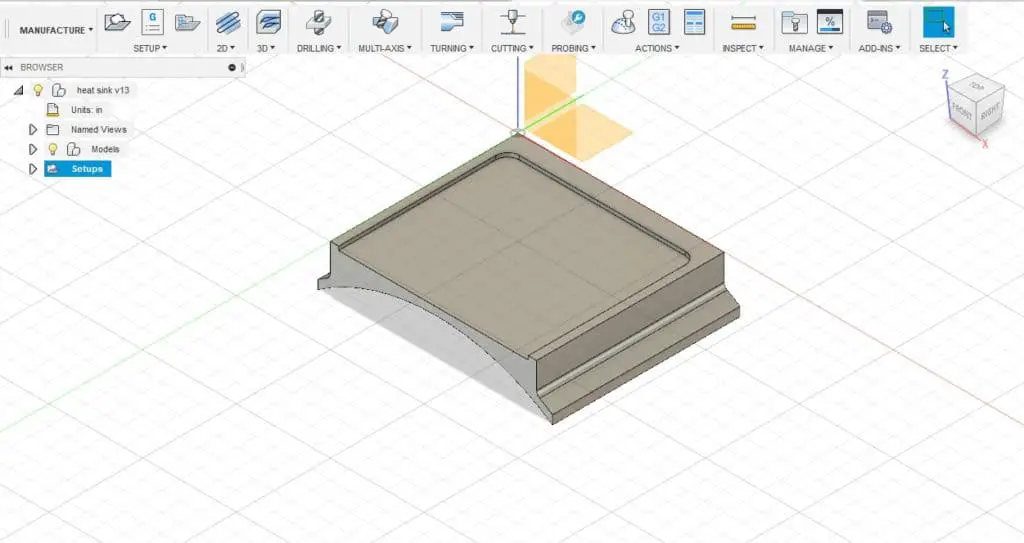
Cam is an acronym for computer aided manufacturing and you will use cam software to produce cutter paths from the profile you imported from your cad software. Once you have your cutter paths you can use a post processor in your cam software to produce a gcode program from those paths.
Ideally you should use cad/cam software which is capable of doing both processes in the same program.
An alternative way is to just use a cad program to draw the part and write the gcode yourself using the coordinates from the cad drawing. Use the cad drawing data to give you start and end points for lines and arcs and positions for holes. This would be very effective if you just need to program 2D shapes and profiles.
No matter which way you make your program you have to do it taking into consideration what cutting tools you have available. Also what type of fixturing equipment you have will potentially change your approach to milling a part.
You can read the article ‘fun cnc project‘ to learn the basics of producing cutter paths with fusion 360.
Upload your gcode program to the machine control software
Once you have created your gcode program you will need to upload it to the PC that controls your machine.
Most of the popular software, such as Mach3 and universal gcode sender, have a gcode “visualiser”. This enables you to see the cutter paths your gcode has created.
It is a good visual indicator that your code will do what you want it to do. If you see a stray line that goes off, straight down or elsewhere, you should check your program for errors.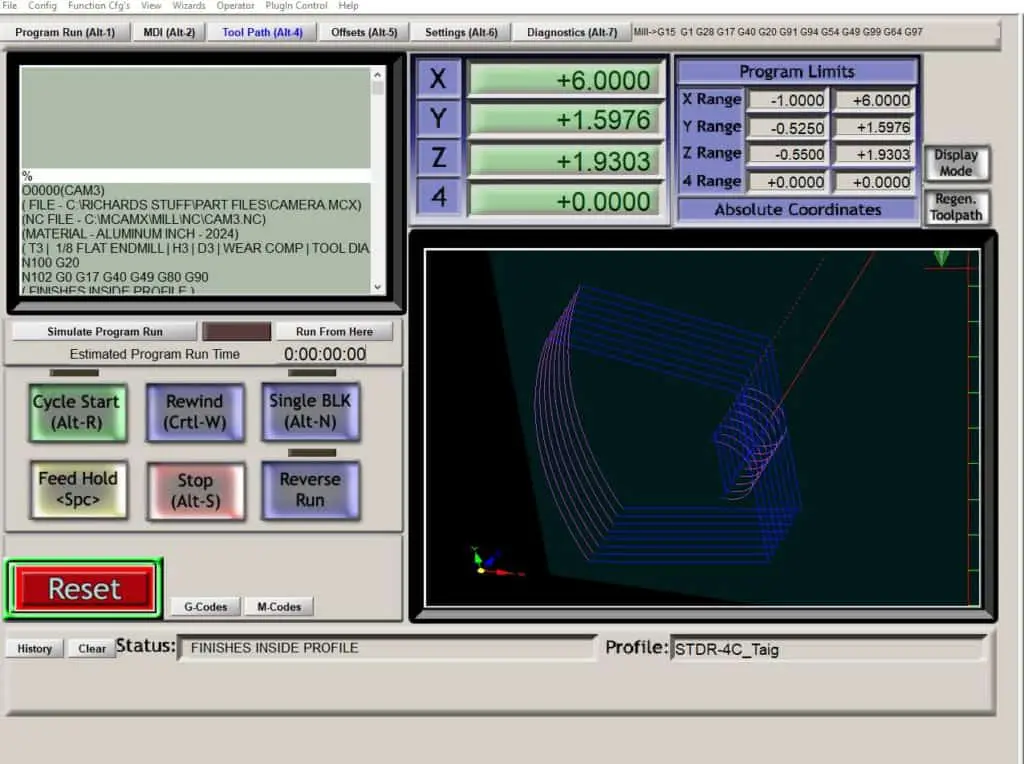
There can be different kinds of errors in a gcode program, for example, you may have a syntax error. This means the software does not recognise a letter or your coordinates do not match from one line to the next. These types of errors will show up when you do a “virtual” run of your part.
Other types of errors include operator errors, when you have used the incorrect values for your coordinates, but the code will run perfectly fine. These can be harder to discover.
If you are producing your gcode with cam software you have to be confident that the post processor you use will work with your software. Choosing the wrong one can give you errors or it might not work with your machine control software at all.
Setup your cnc machine
When you are happy that the gcode program you created is good to go you will have to setup your machine.
When you wrote the program you should have decided how to hold your stock, which orientation it should be in and where to position the datums. Now you have to set it up correctly and make sure it is tight and secure.
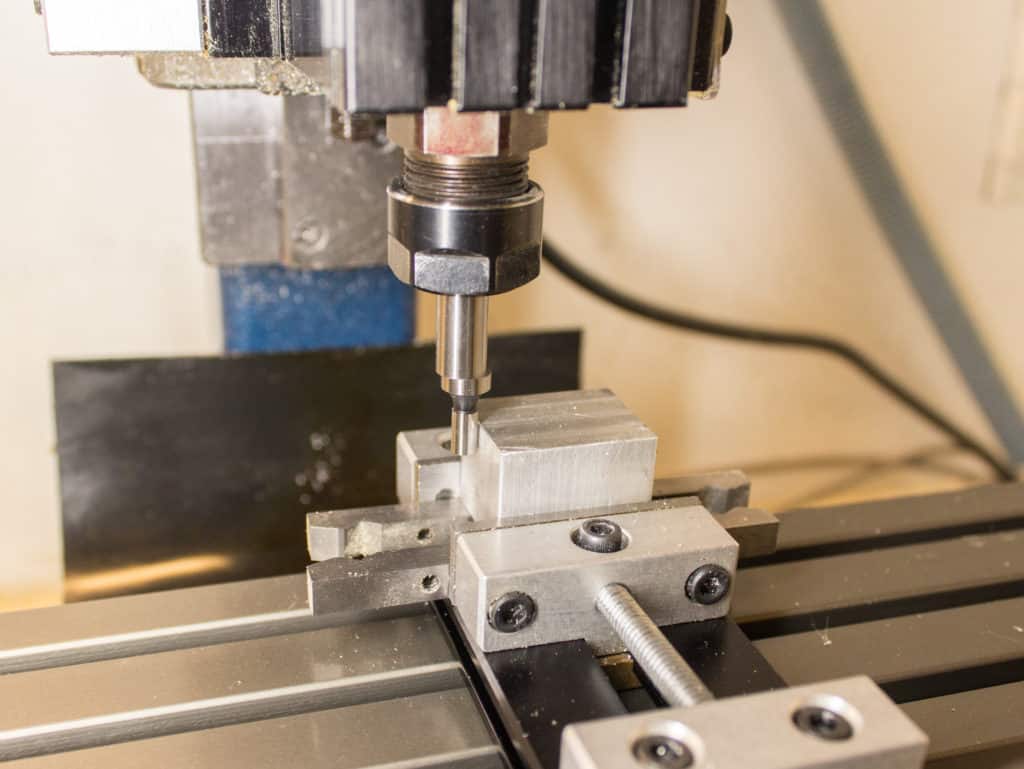
Having your stock firmly fixtured is one of the most important aspects of ensuring your part will be accurate and completed successfully. Your endmills will thank you for it as they will not last if the part vibrates when you machine it.
Having fixtured your part securely you now have to set your datums. These are also known as your offsets, g54, g55 etc. Do not confuse these with your machine reference position, also known as the machine home position. I go into this in more detail in another article here.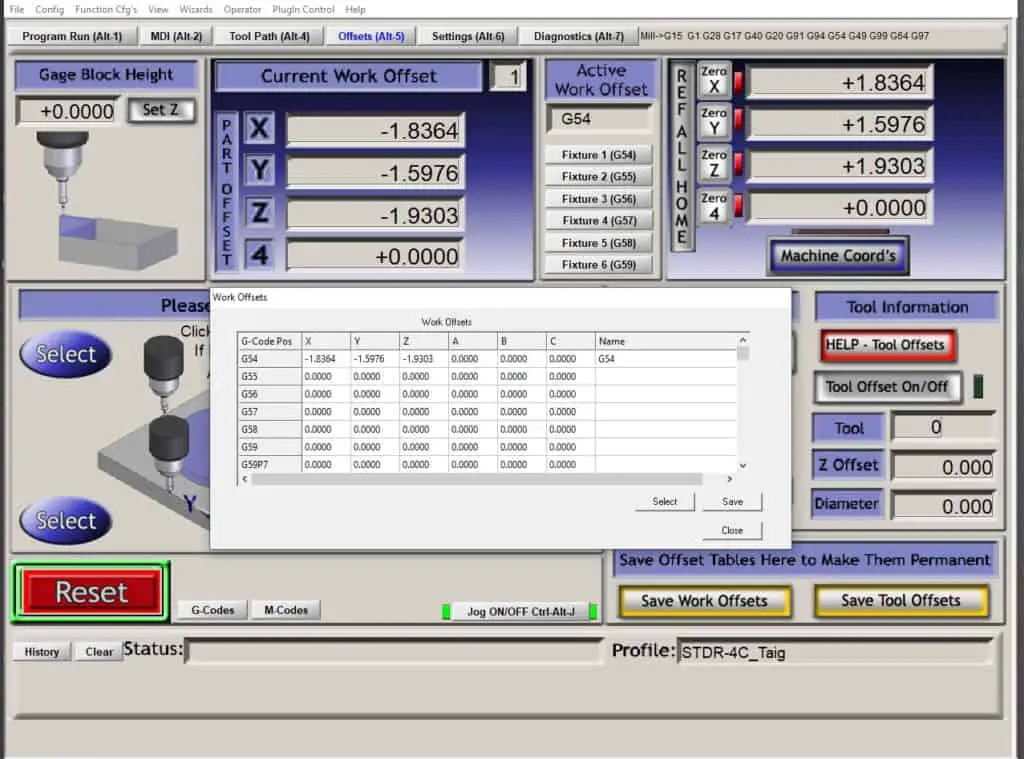
Run the program
Your first programs are not going to be perfect, in fact it is perfectly normal to have to make adjustments after you run it for the first time.
The usual issues will be spindle speed, feed rate and your depth of cut. This is an area you will have to learn yourself because every machine is different. There are ways of establishing approximate values for each of these variables, I explain this in my feeds and speeds article.
Summary
It might seem like a lot to learn at first, but just keep it simple and approach it one step at a time. Always have a goal in mind and work towards it. For example you may want to make miniature working models from blueprints like the ones you can buy at J.E. Howell model engine plans. Whatever your goals are just take a step by step approach to success. If you are interested in machining as a profession follow this link to find out a machinists salary.
I also provide a 7 step beginners guide to cnc pdf download. It will remind you of the procedure you need to follow and minimize errors until you are more confident. If you need to learn basic G code programming my tutorials begin with the article G code programming for dummies.

